
Register
Register for an event in three steps: choose, say who is coming, and pay. It works the same on a phone and a computer.
The event page
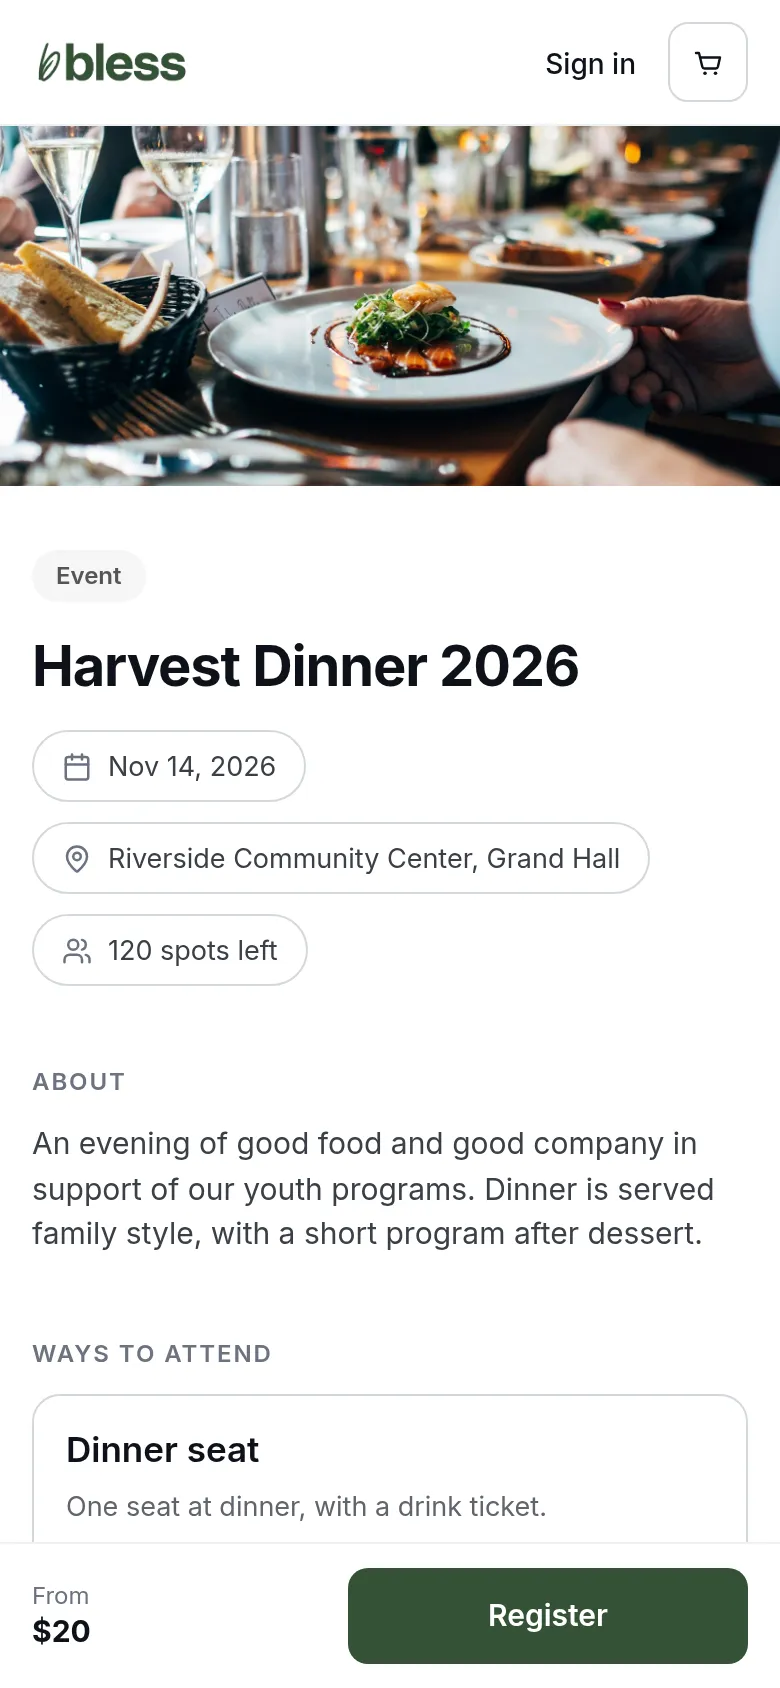
The page shows the date, the place and the spots left. Read About for what to expect. Sessions and Location are lower on the page.
Choose how to attend
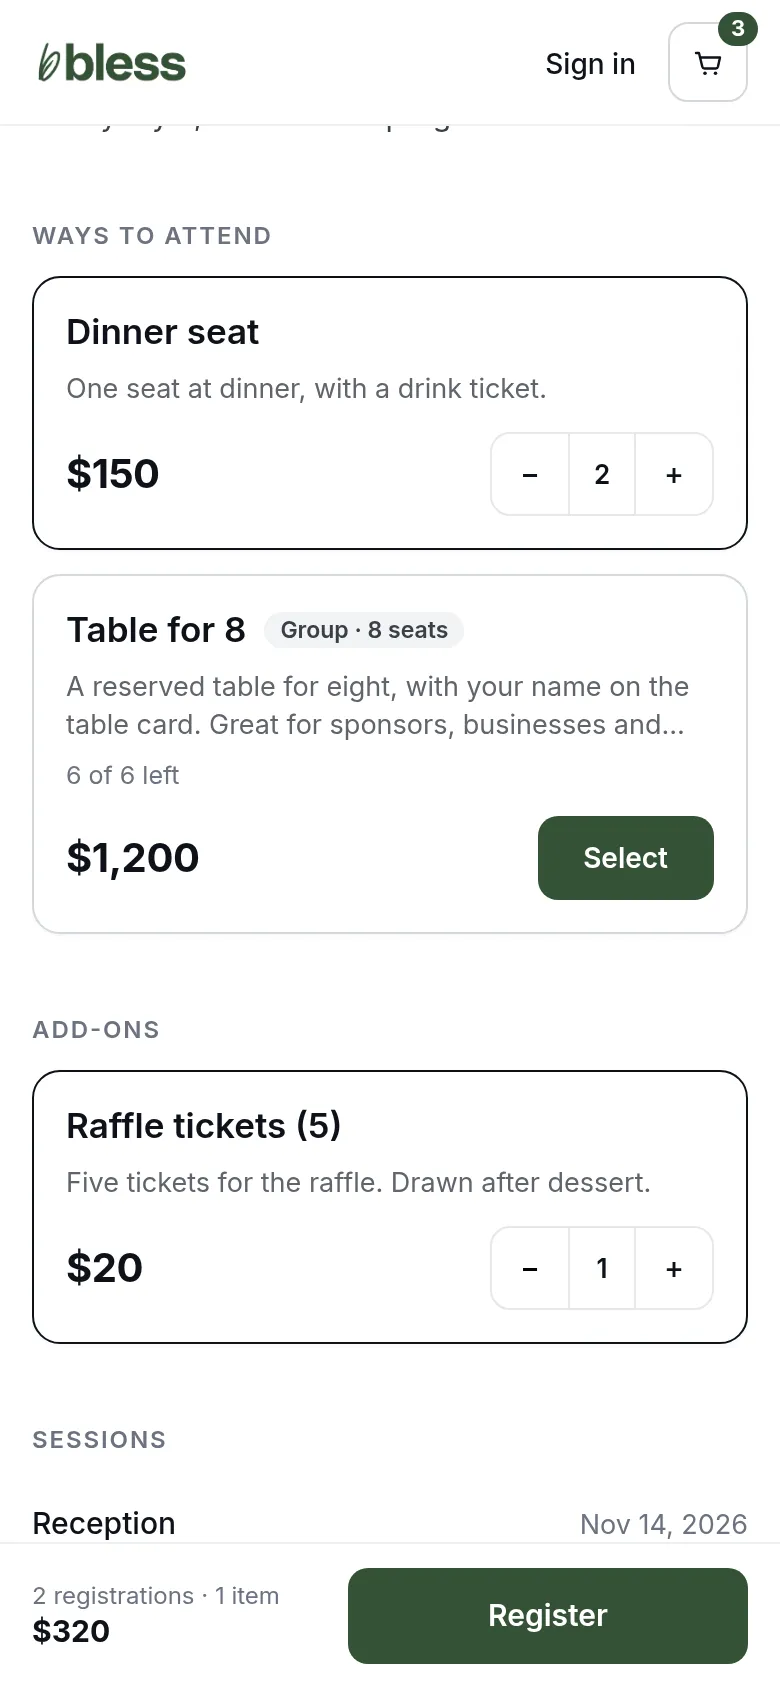
- Under Ways to attend, press Select on the one you want.
- Use + and − to choose how many.
- Under Add-ons, choose any extras.
- Press Register at the bottom.
A Group badge means one purchase buys a block of seats, such as a table for 8. To buy one, see Host a table.
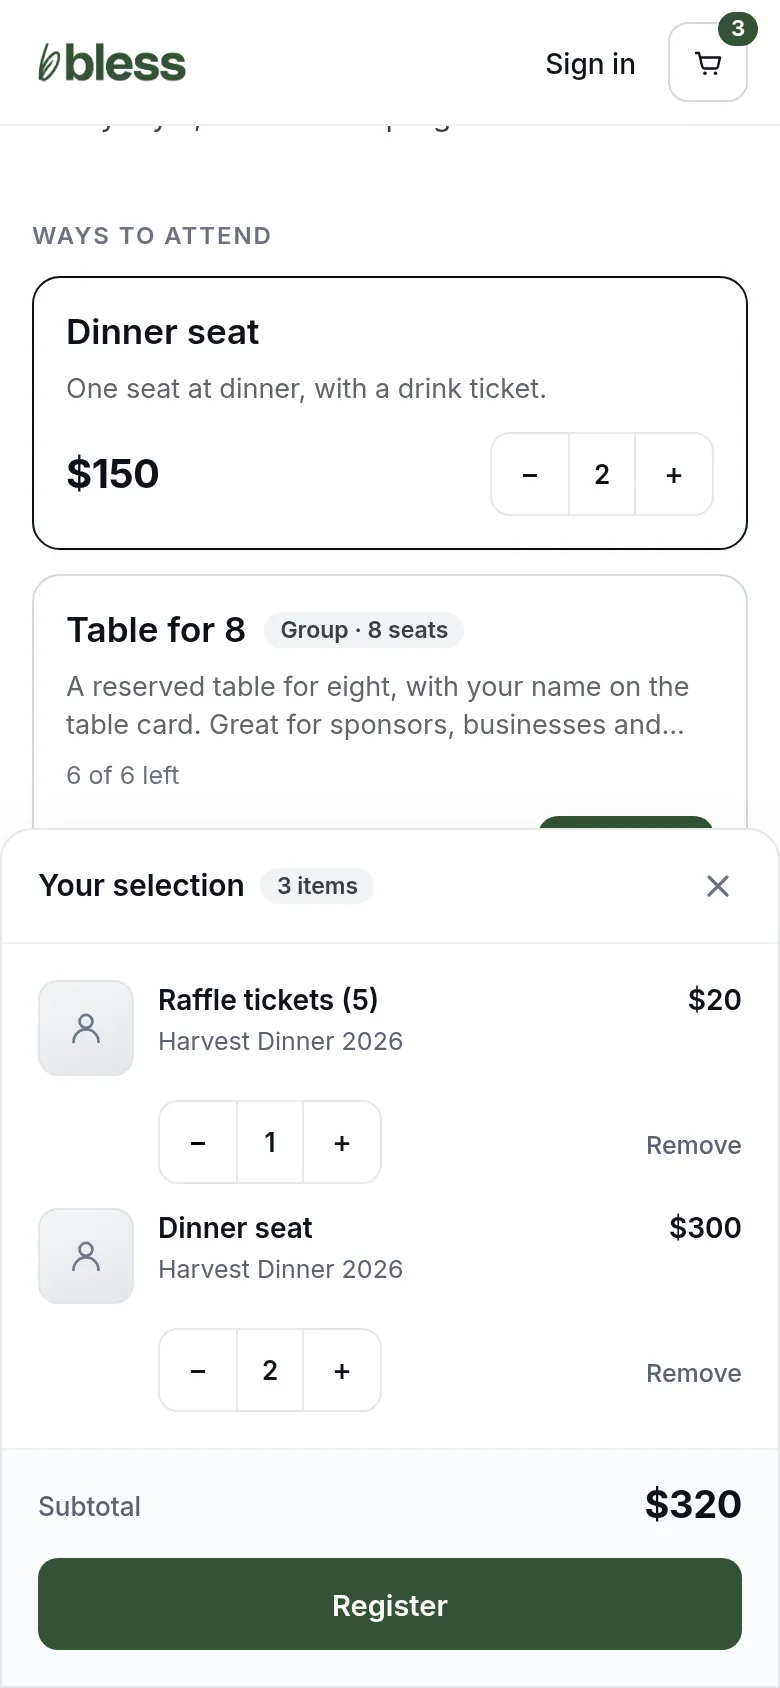
To check your choices first, press the cart at the top. Your selection lists each item. You can change the number or press Remove.
Say who is coming
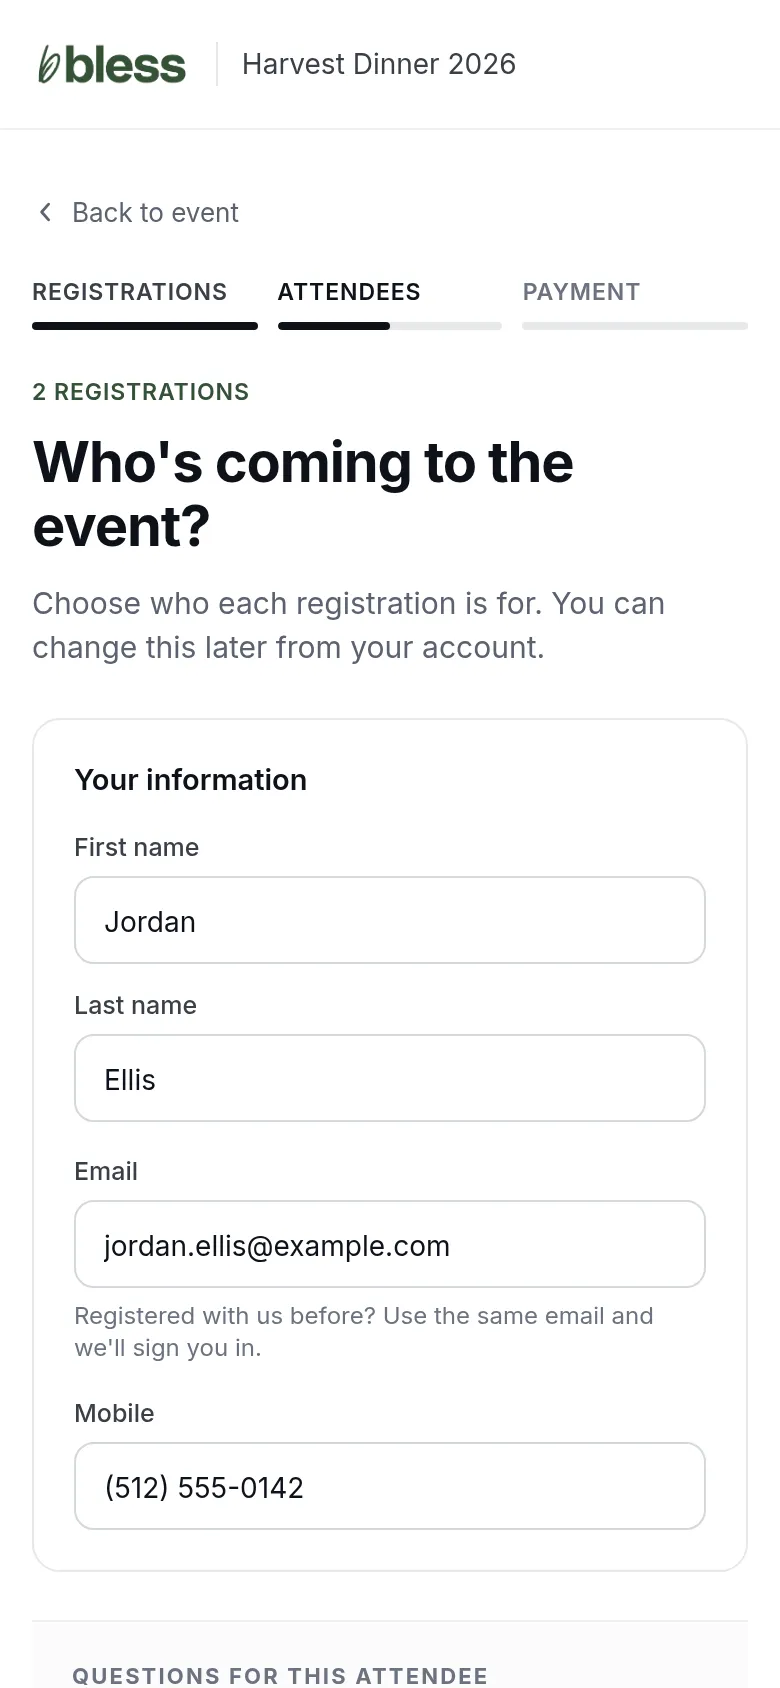
- Type your name, email and mobile number under Your information.
- Answer the questions for yourself.
- For each other person, type their name and email, and choose their relationship to you.
- Answer the questions for each person.
- Press Continue to payment.
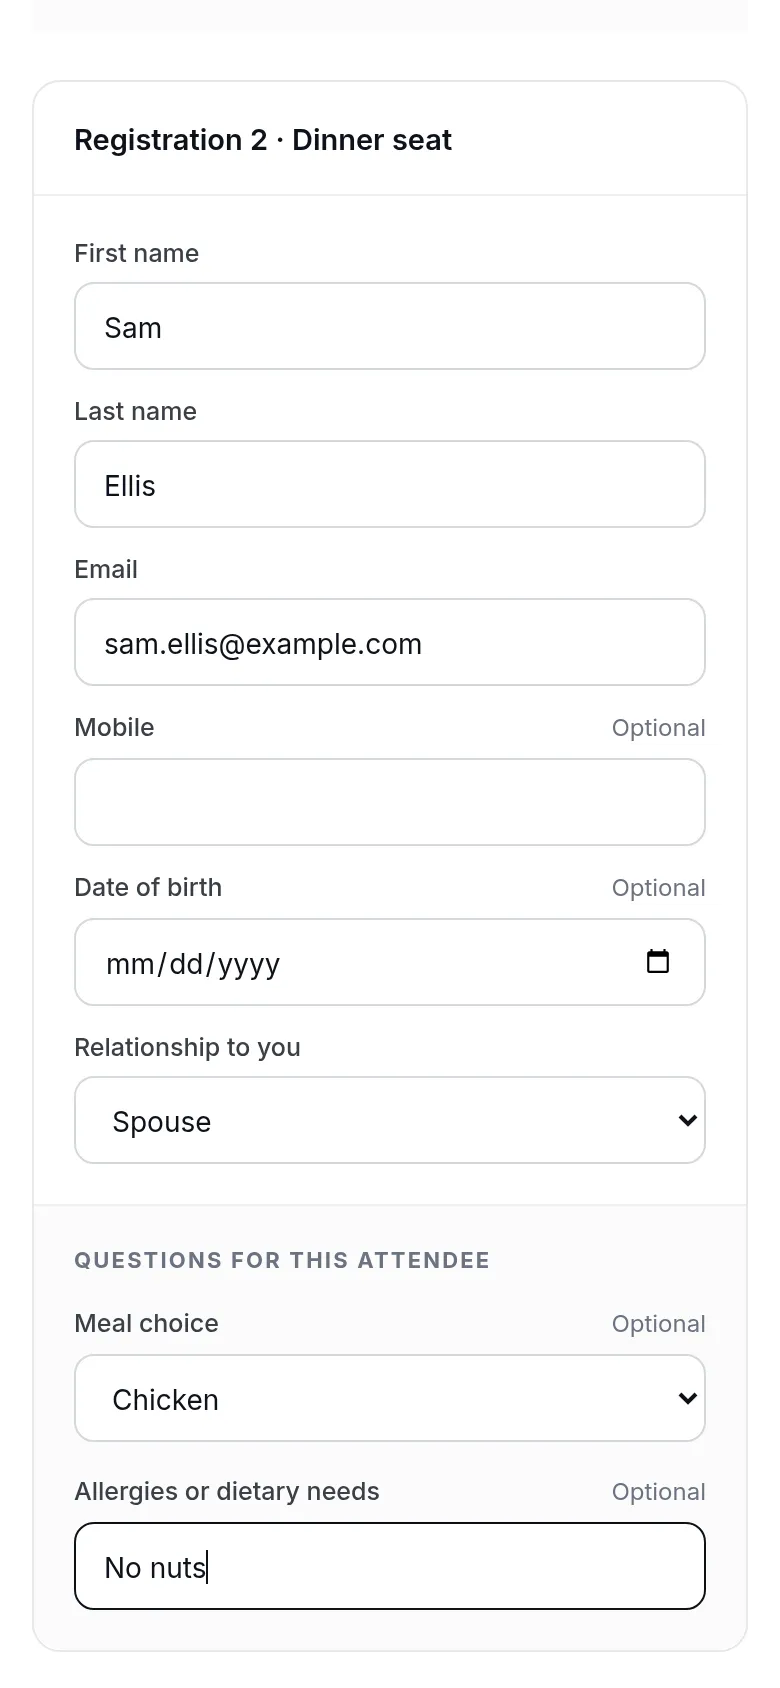
Registered with this organizer before? Use the same email. Bless asks for your password and signs you in.
A timer at the top shows how long you have to finish. If it runs out, choose your registrations again.
Pay
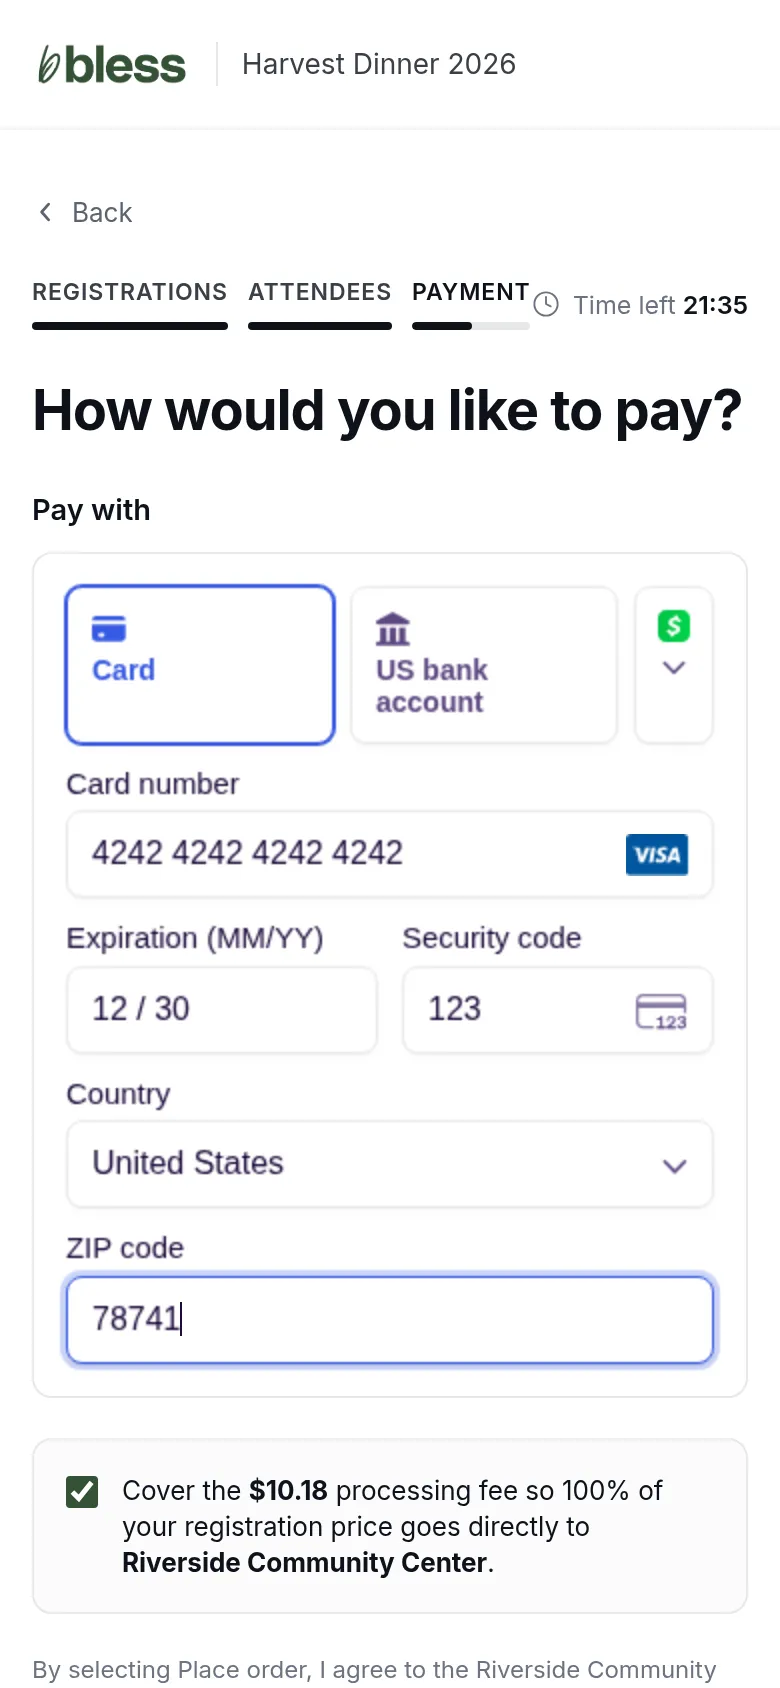
- Choose how to pay: a card, a US bank account, or another option shown.
- Type your details.
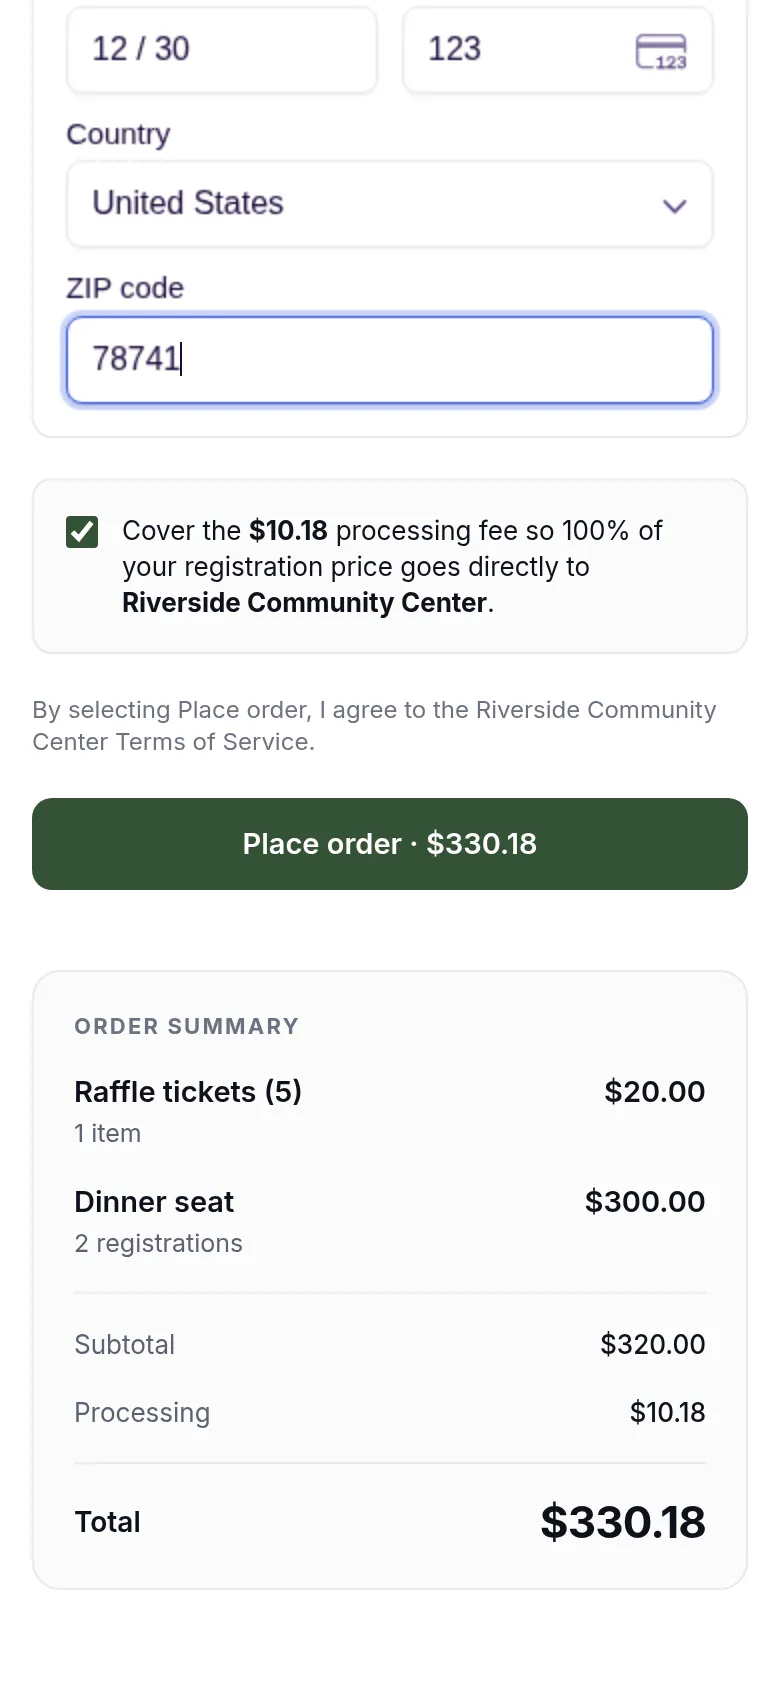
- Leave the box ticked to cover the processing fee, or untick it.
- Check the order summary.
- Press Place order. The button shows the total.
If the event is free, you see Confirm your registration and press Register. You do not pay.
Answer the questions
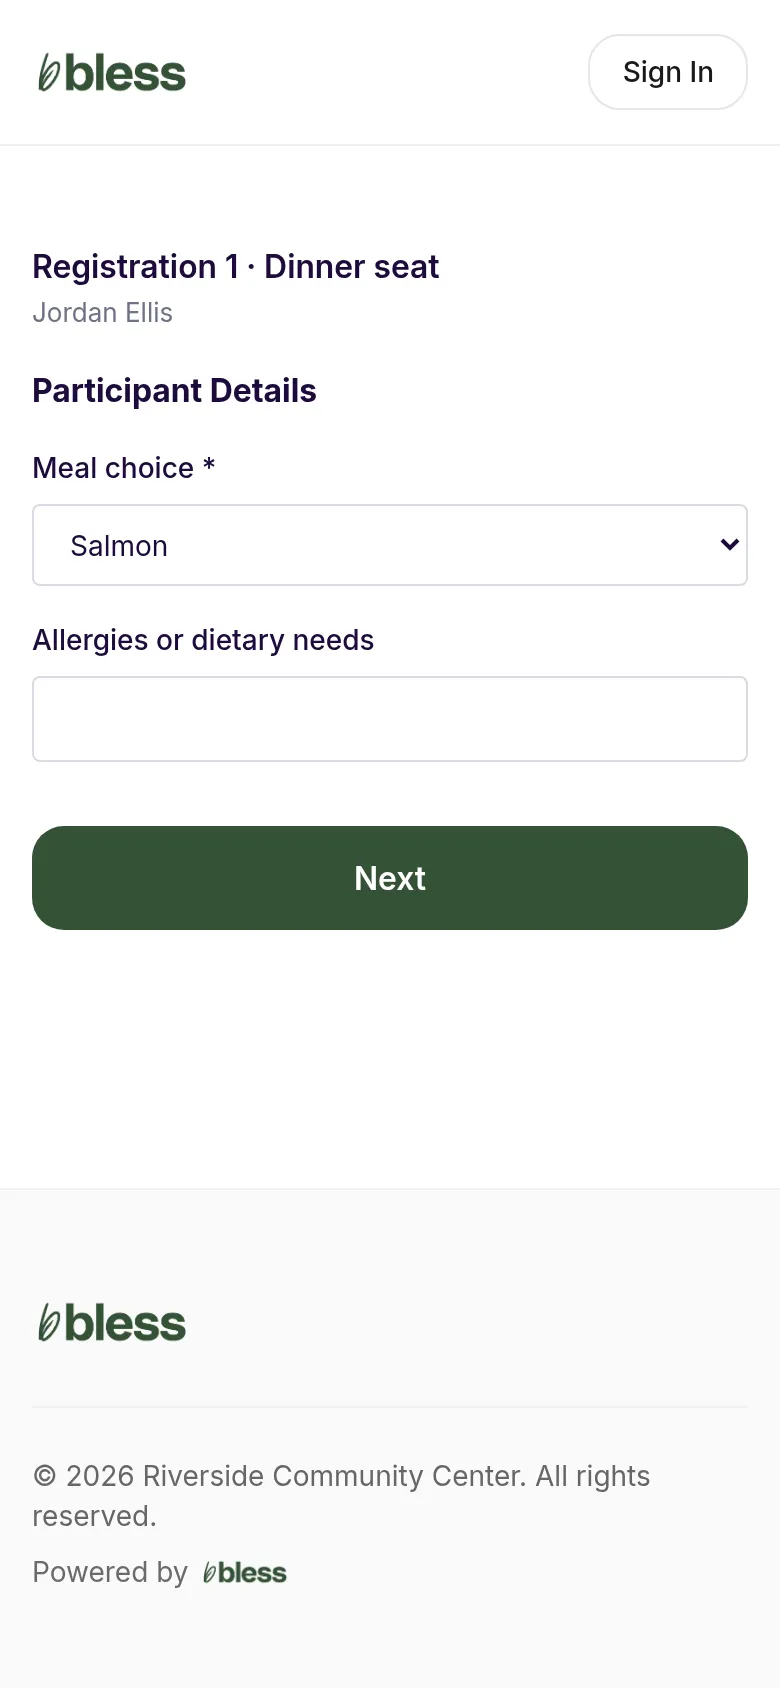
Some organizers ask more questions after you pay. Check each answer and press Next.
You’re registered
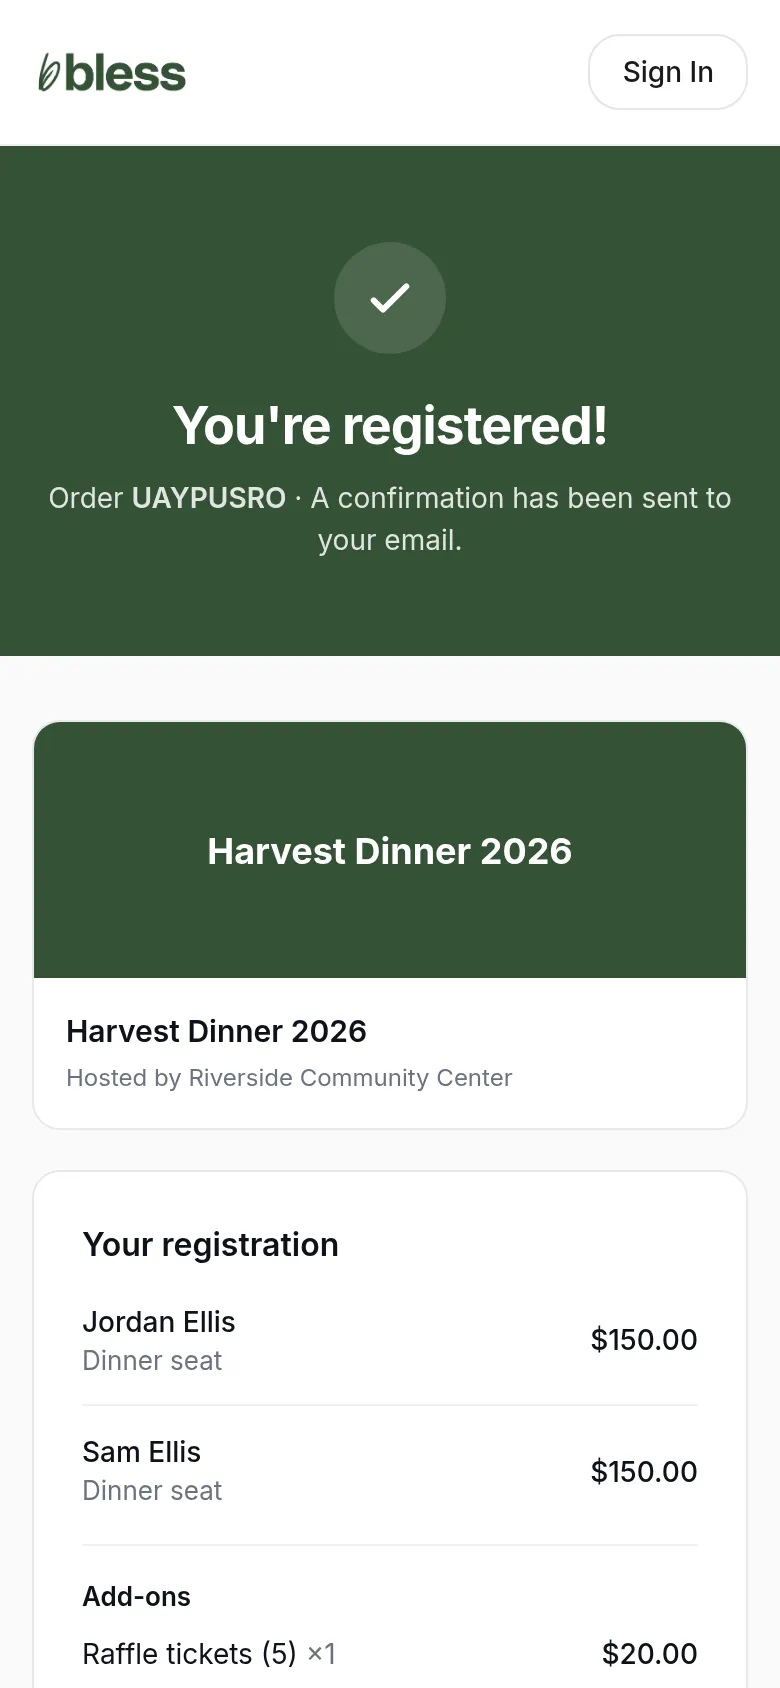
The page shows your order number, each person, the add-ons and the total paid. A confirmation goes to your email.
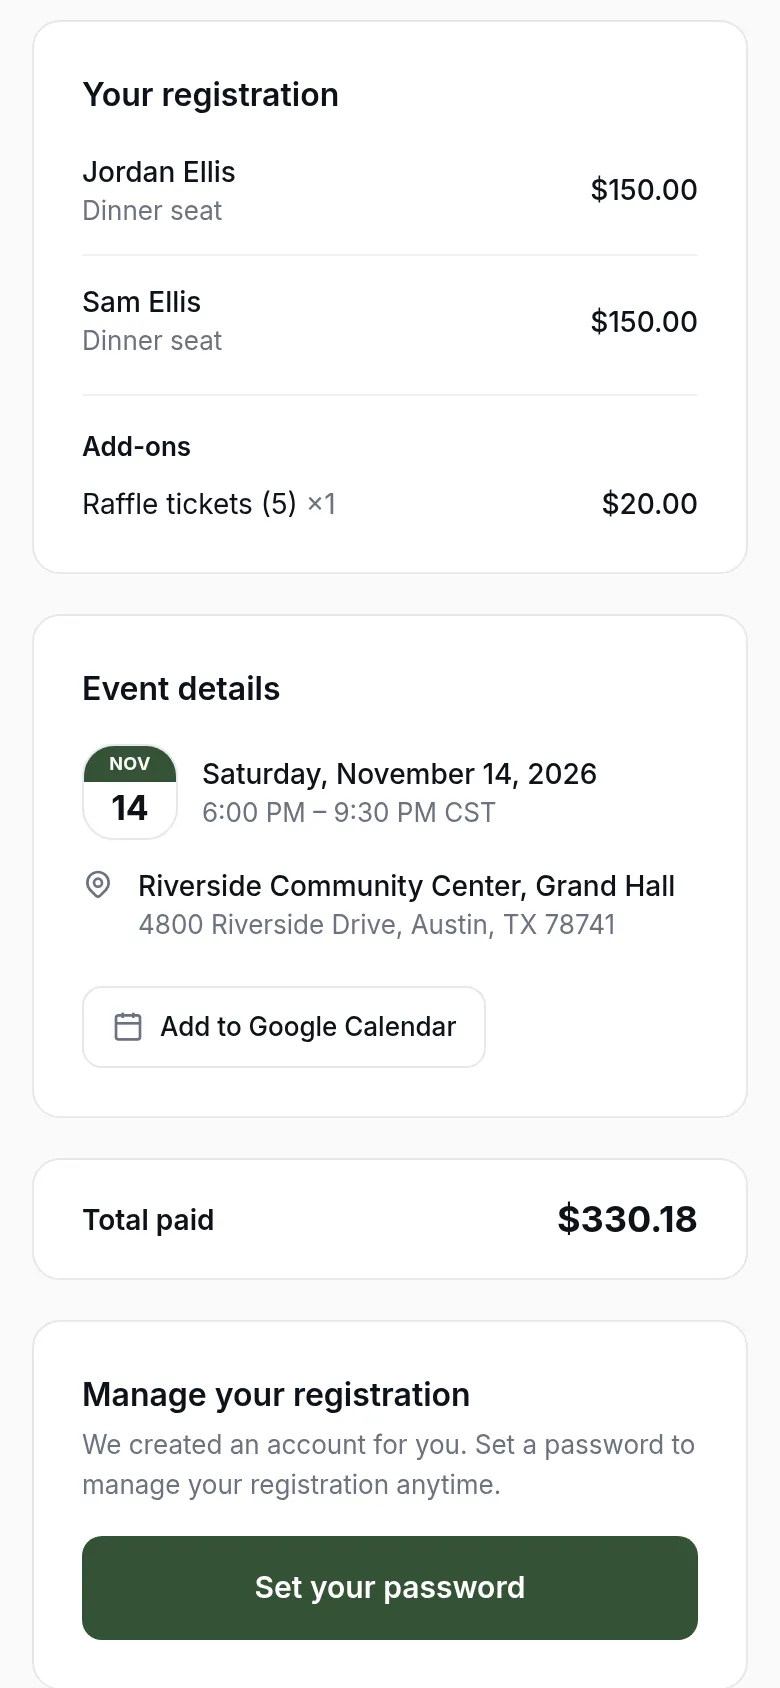
- Press Add to Google Calendar to save the date.
- Press Set your password to manage your registration later. Bless made an account for you with your email. See Your account.
The emails you will get
| When | Subject |
|---|---|
| You register | Registration confirmed for (event) |
| You join the waitlist | You’re on the waitlist for (event) |
| A spot opens for you | A spot opened up for (event)! |
| You did not finish paying | Finish registering for (event) |
| The organizer still needs an answer | A few questions before (event) |
| You host a table with open seats | (number) open seats at your table for (event) |
When the event is full
If the organizer turned on a waitlist, you see Join waitlist instead of Select.
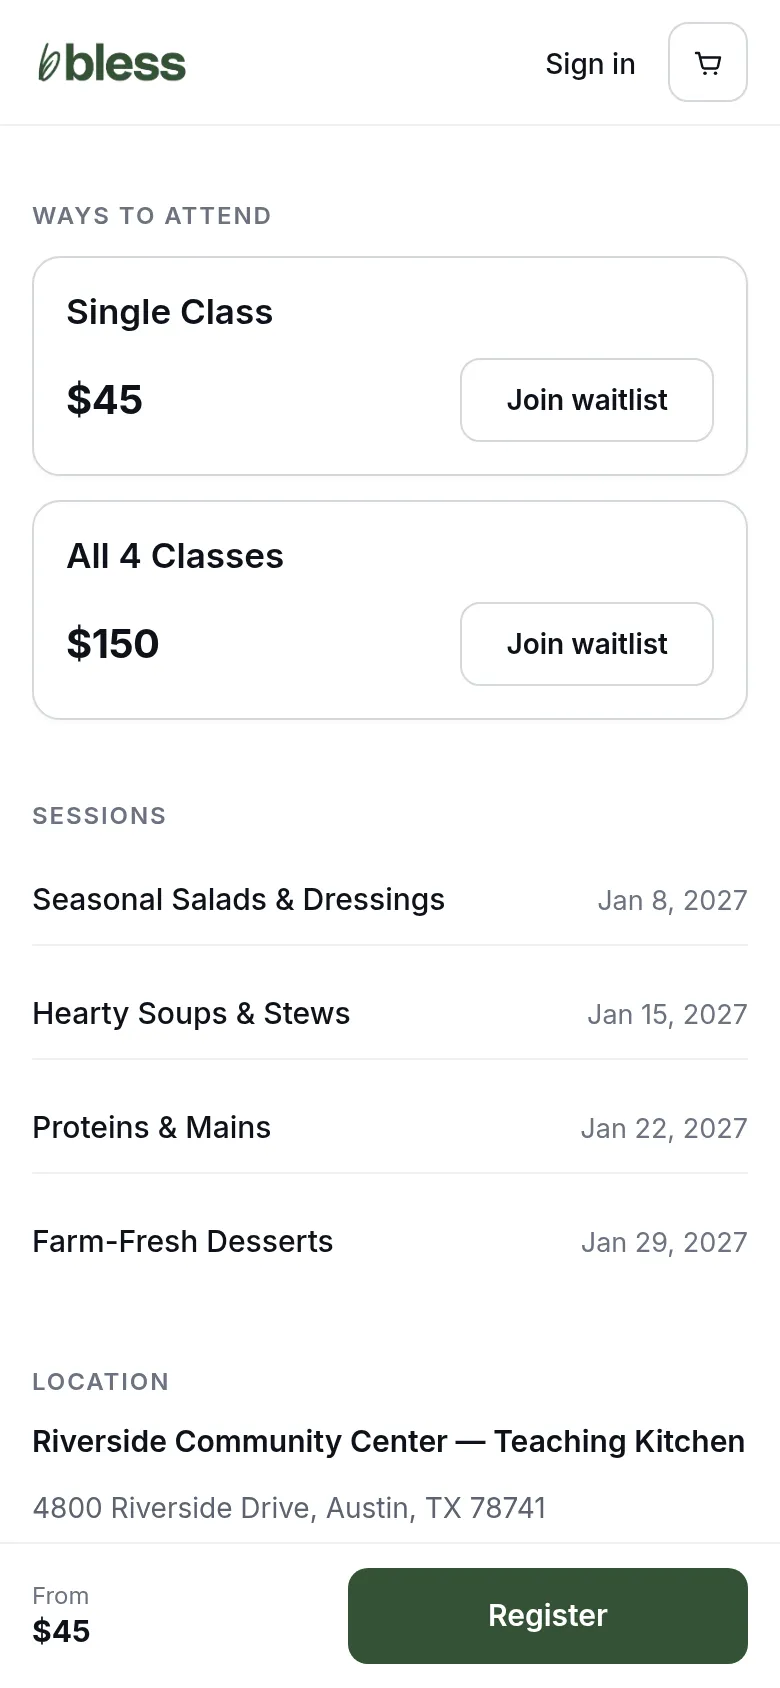
- Press Join waitlist, then Register.
- Say who is coming, as for a registration.
- Finish the last step.
You get an email that you are on the waitlist. When the organizer offers you a spot, you get another email. For a paid event, use the link in that email to finish registering and pay.
If your card is declined
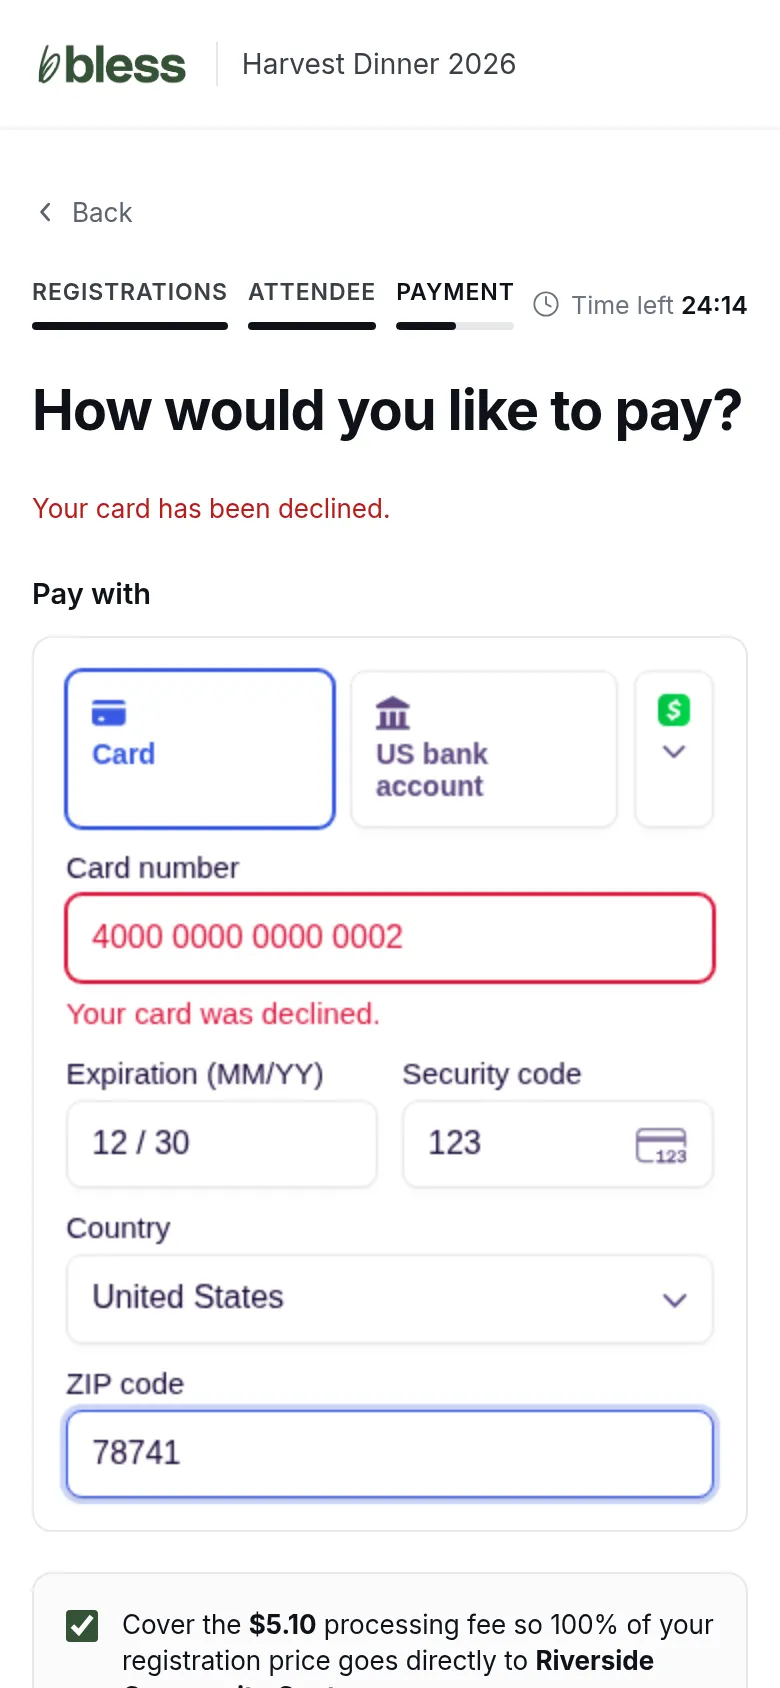
The page says why at the top. Nothing is charged.
- Check the card number, the date, the code and the ZIP code.
- Try again, or use another card.
If you leave without paying, the organizer sees that your checkout is not finished. You may get an email with a link to finish.
Updated
Was this page helpful?
Thank you. Your answer helps us make these pages better.