
Set up the auction
Everything you do in the weeks before the event, in the order you will do it.
Draft. These pages describe the auction night as it is being built. Some screens are not released yet, and the pictures use sample data.
The Auctions list
Every auction in your organization. The live one is always first, then scheduled auctions, drafts and closed ones.
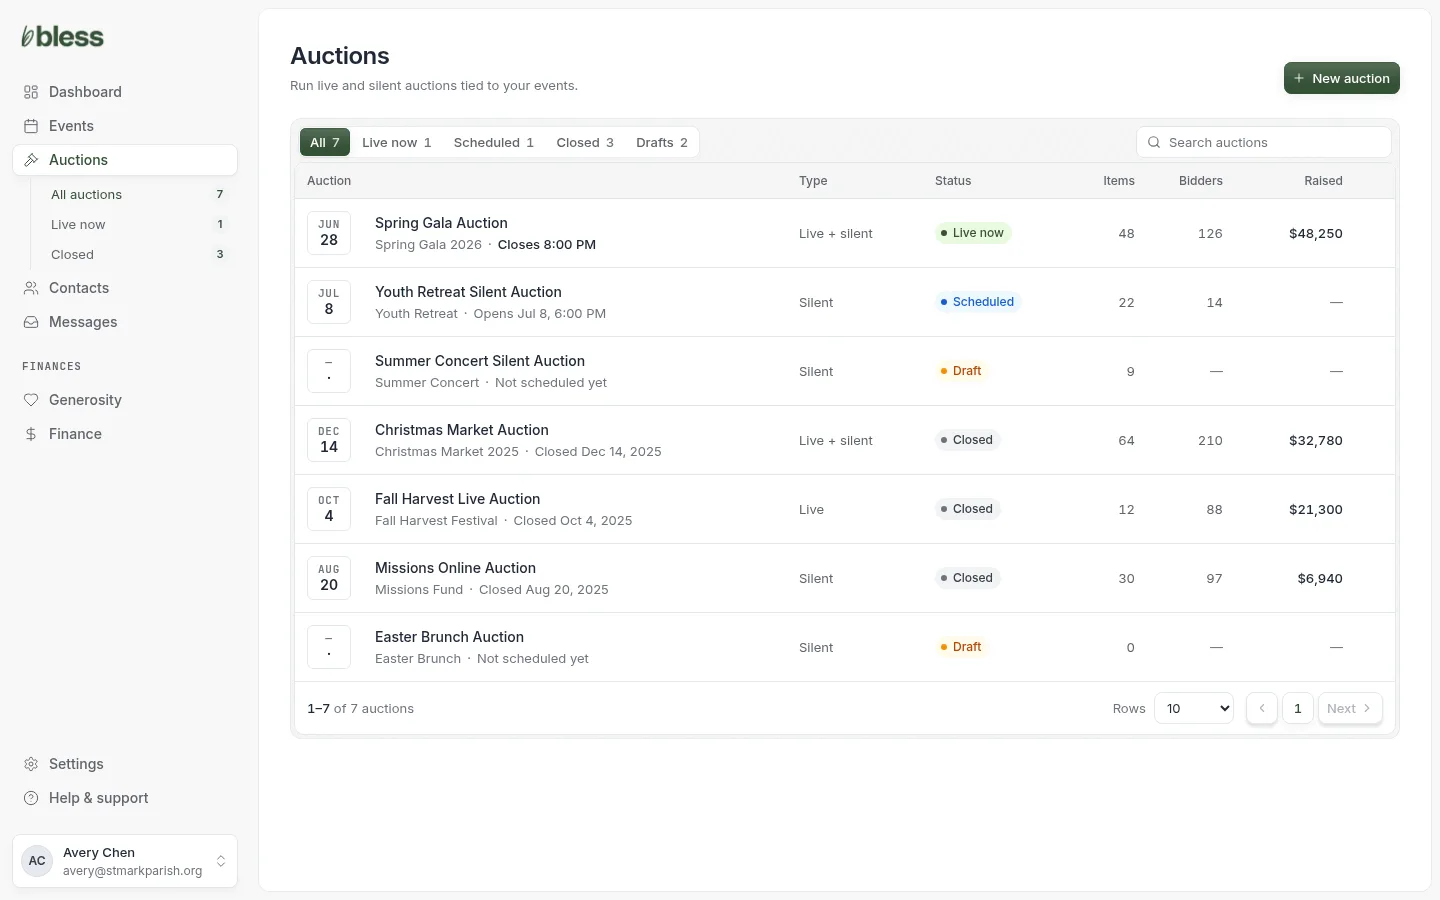
- Read down the list. Each row shows the one time that matters now: when it closes, when it opens, or when it closed.
- Filter by status or search by name.
- Open an auction, or press New auction.
Create an auction
A new auction takes five steps. You can stop and come back at any step.
Step 1: Basics
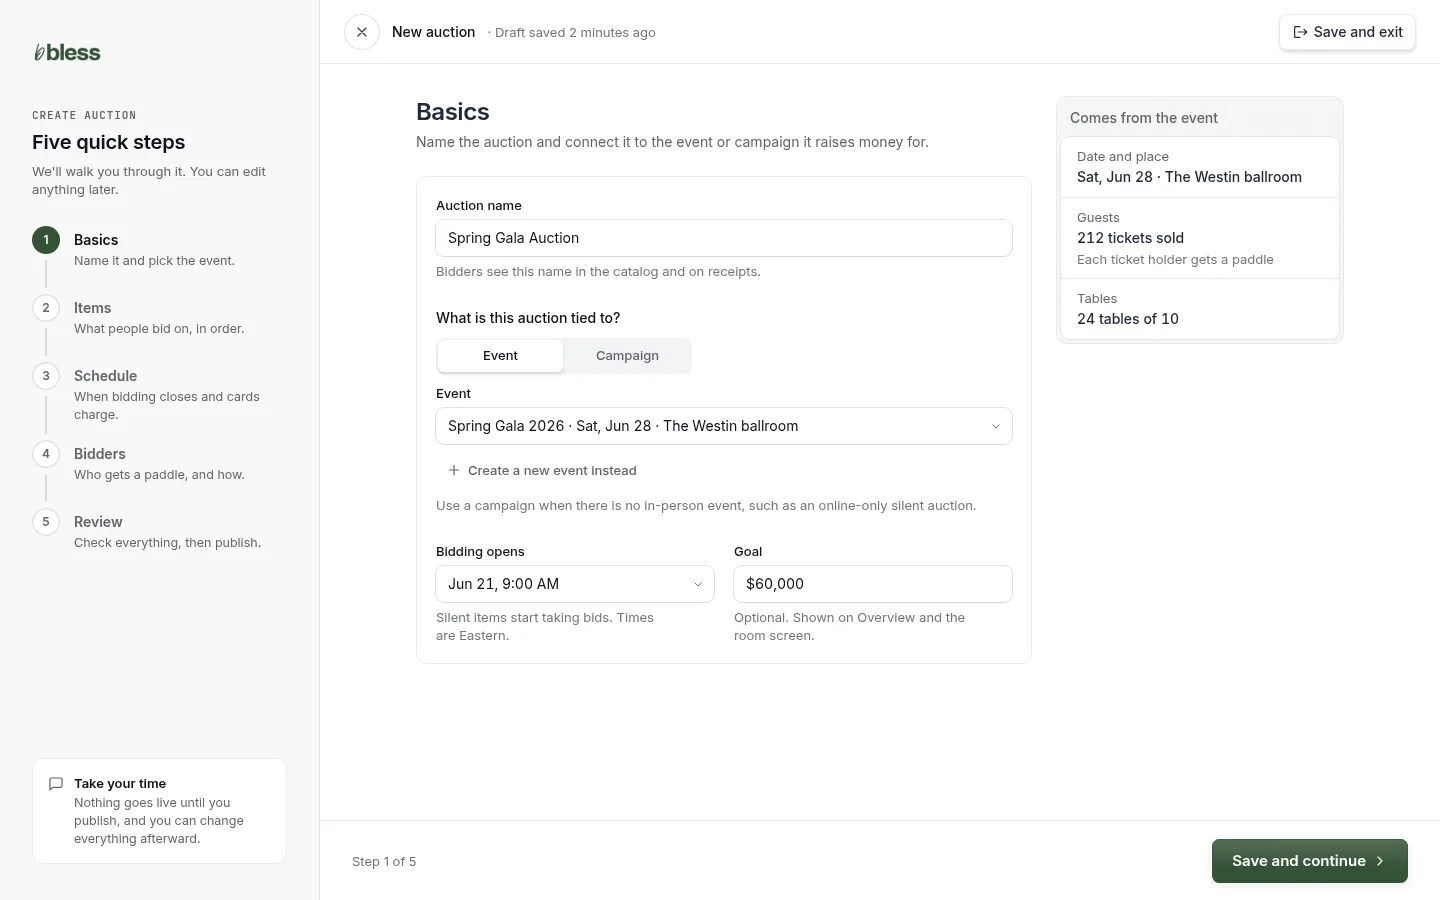
- Type the auction’s name.
- Choose Event or Campaign and pick which one.
- Set when bidding opens.
- Set a goal, or leave it blank.
- Press Save and continue.
Pick the event first. Its date, place, guests and tables come with it and show on the right.
Step 2: Items
What people bid on, in the order the night runs.
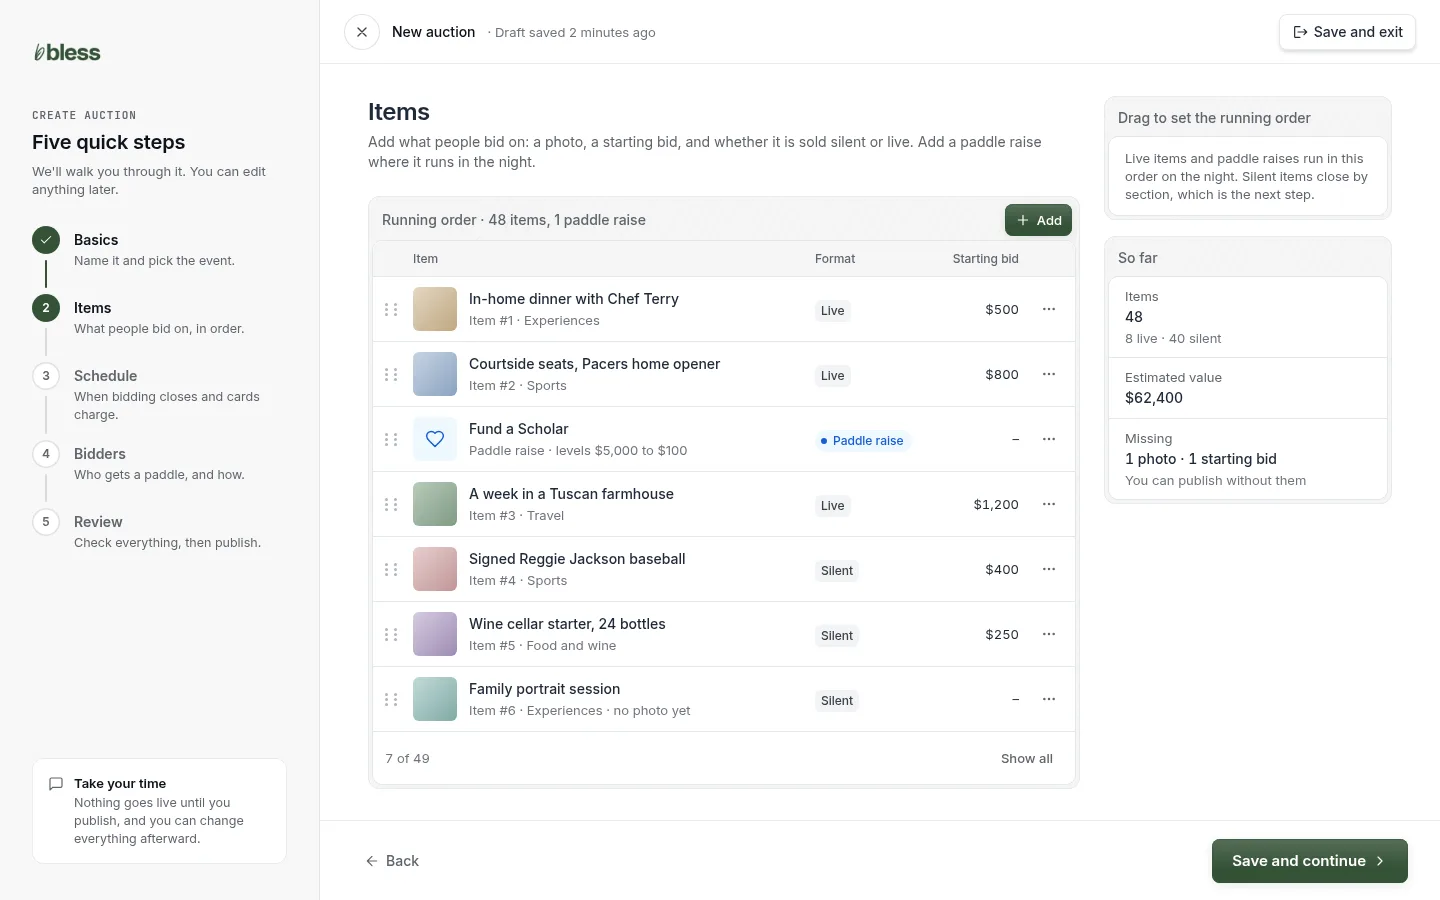
- Press Add and choose an item or a paddle raise.
- Fill in the photo, name, format and starting bid.
- Drag rows into the running order. You can also use Move up and Move down from a row’s menu.
- Press Save and continue.
Most organizers build the item list over several sittings. Nothing is public until you publish.
Step 3: Schedule
When bidding ends and when guests pay.
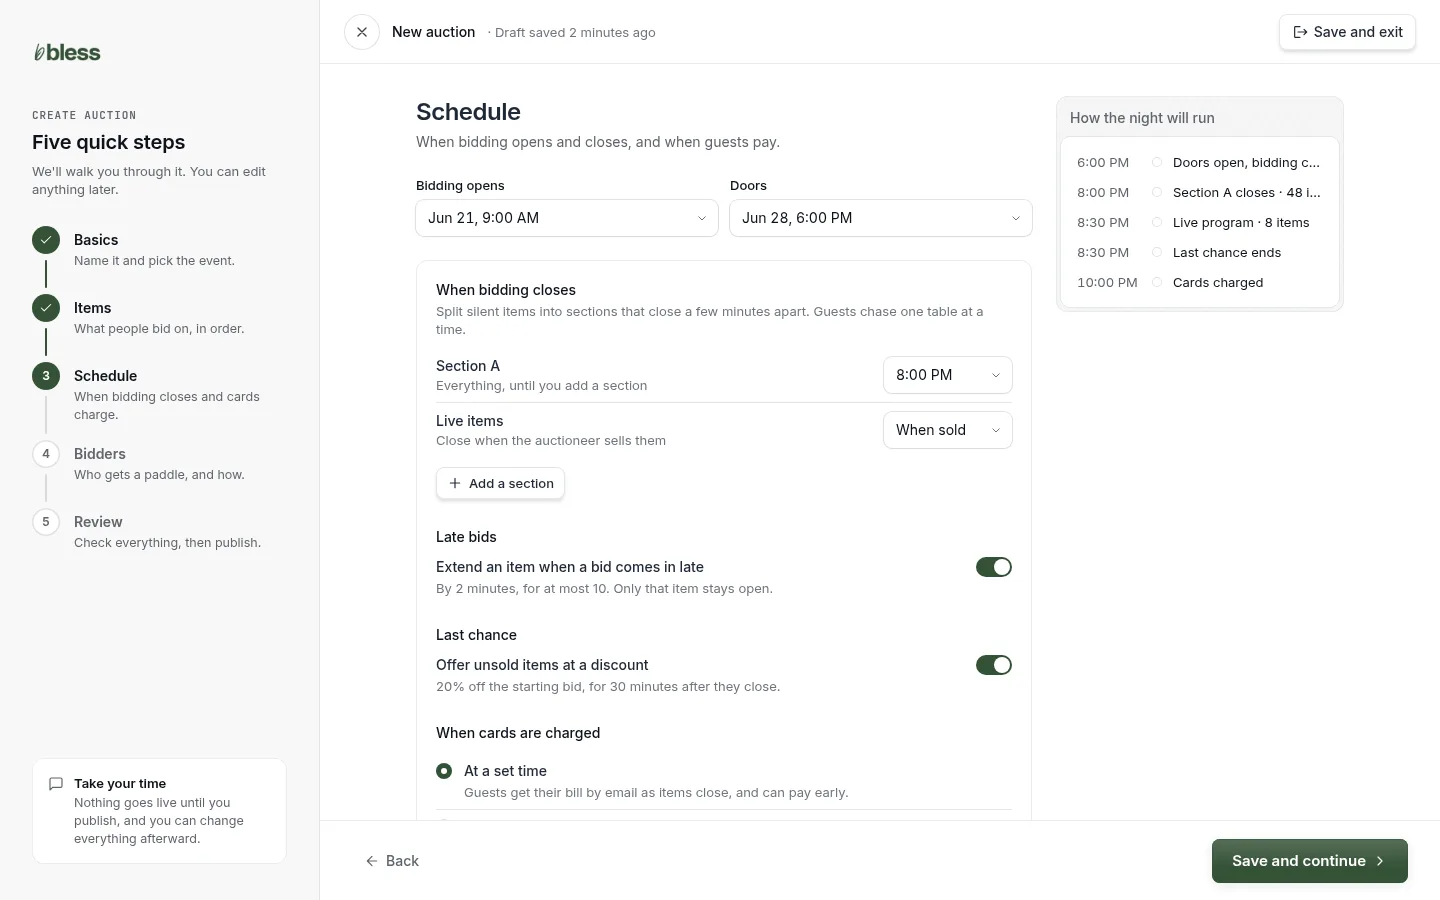
- Set when bidding opens.
- Leave one section, or add more if you want groups of items to close at different times.
- Keep or turn off the late-bid extension and last chance.
- Choose when cards are charged.
The preview on the right redraws as you change things, so you can see how the night will run. A small auction can leave everything in one section.
Step 4: Bidders
How guests get a paddle and a card on file.
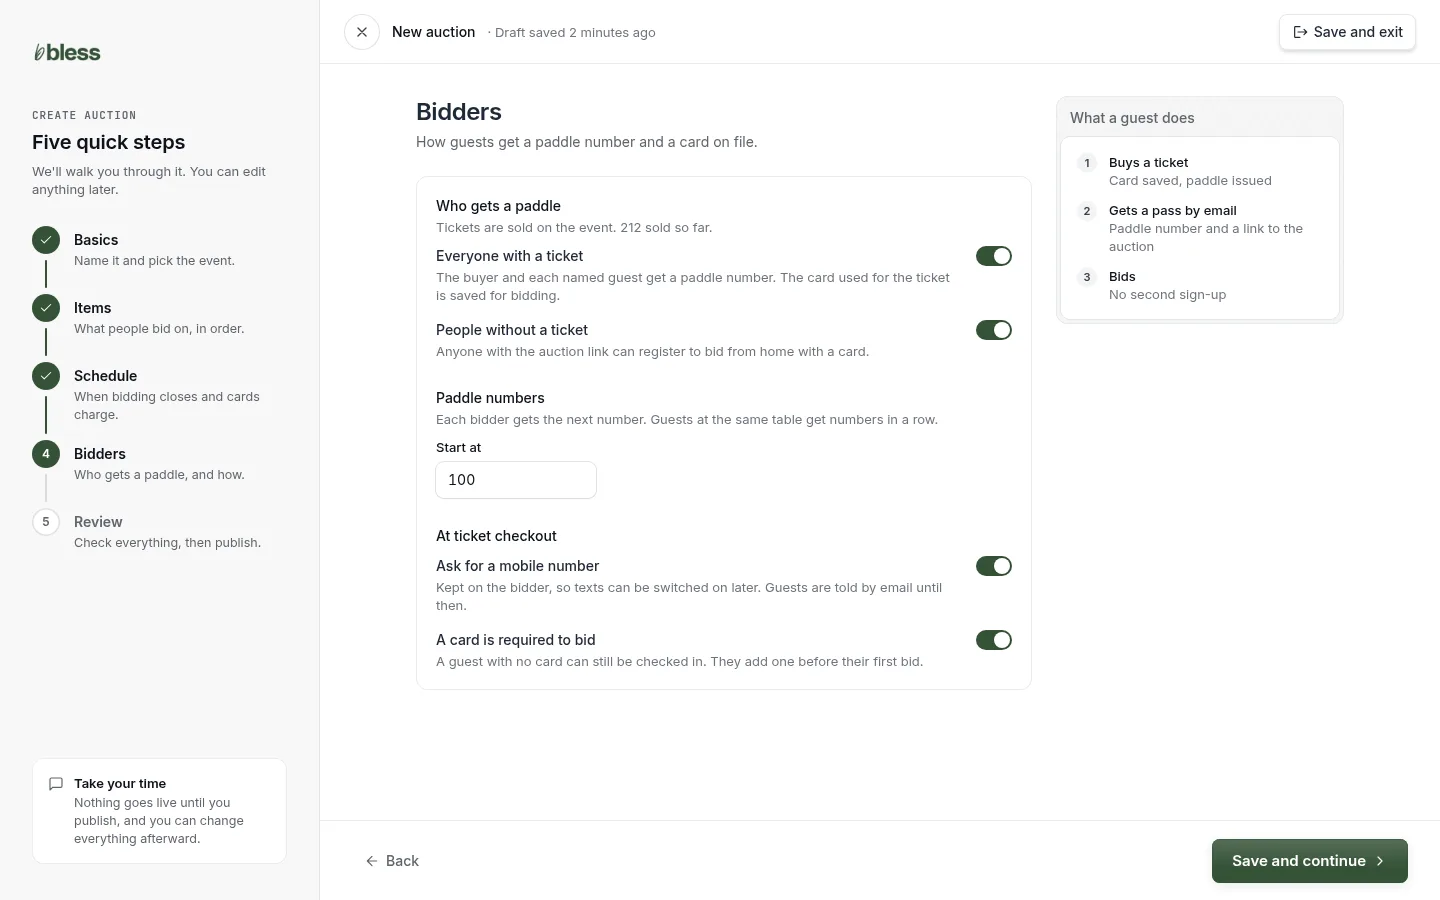
- Leave Everyone with a ticket on.
- Decide whether people without a ticket may bid.
- Set the first paddle number.
- Press Save and continue.
Step 5: Review and publish
The whole auction on one page.
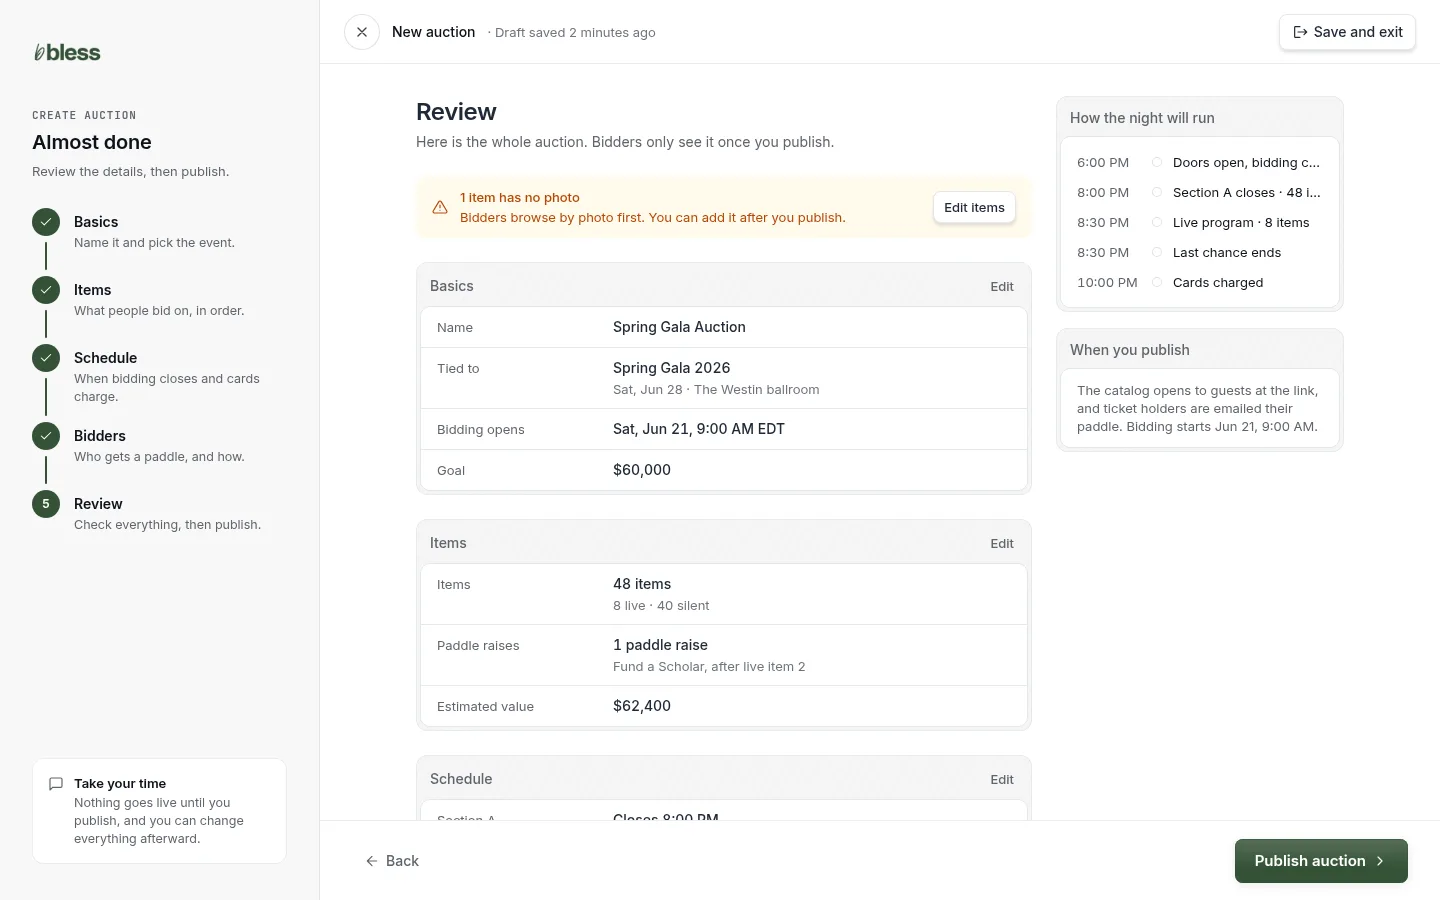
- Read any warning at the top.
- Check each group. Edit takes you back to that step.
- Read How the night will run.
- Press Publish auction.
Items and close times
The Items tab lists every item with its high bid, who is leading, and when it closes.
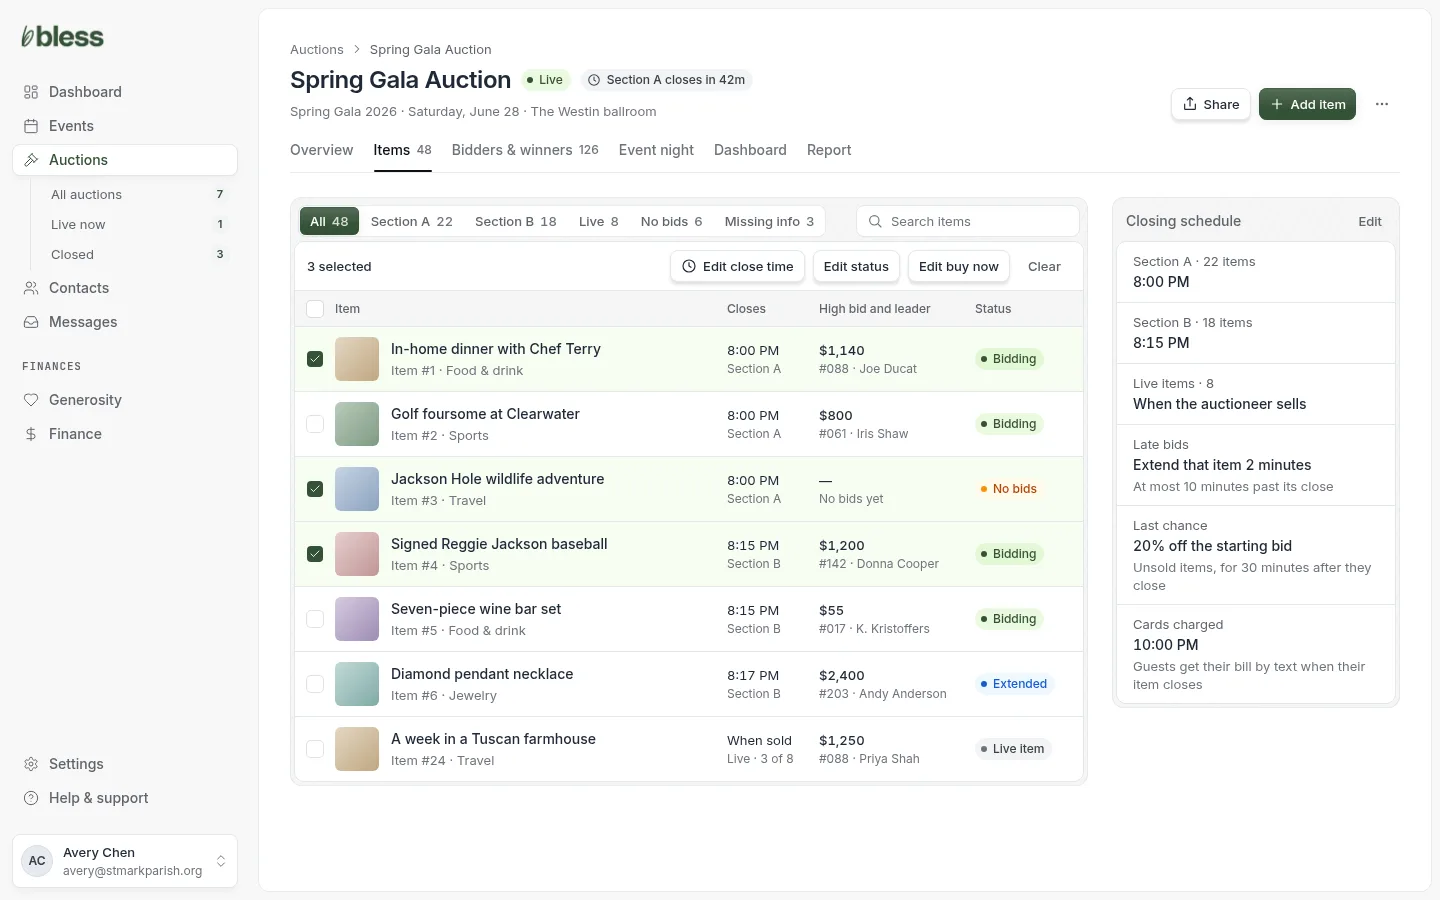
To move a close time:
- Filter by section to see everything that closes together.
- Tick the rows you want to change.
- Press Edit close time and choose a time.
The Closing schedule panel on the right shows the rules that apply. To change them, press Edit. See Closing schedule.
Edit an item
Opening an item slides a sheet over the Items tab, so the list stays in view behind it.
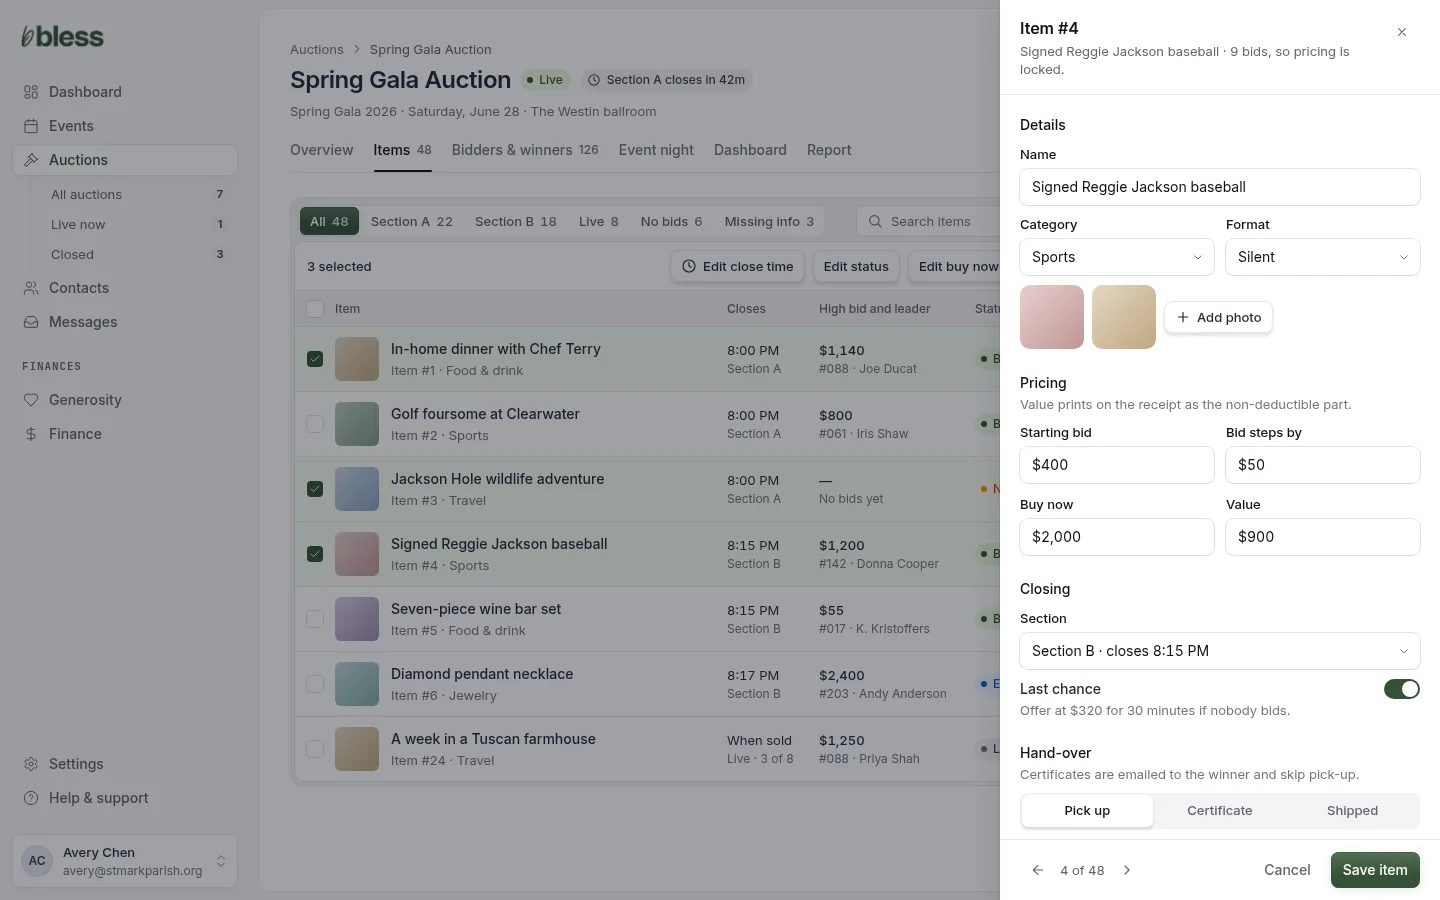
Work down the sheet:
- Name, category and photos.
- Prices.
- Which section it closes with.
- How the winner gets it.
- Press Next item to keep going without closing the sheet.
Prices lock once an item has bids. The sheet tells you when that has happened.
Categories
Categories are the groups bidders browse by. They also set the order of the catalog’s filters.
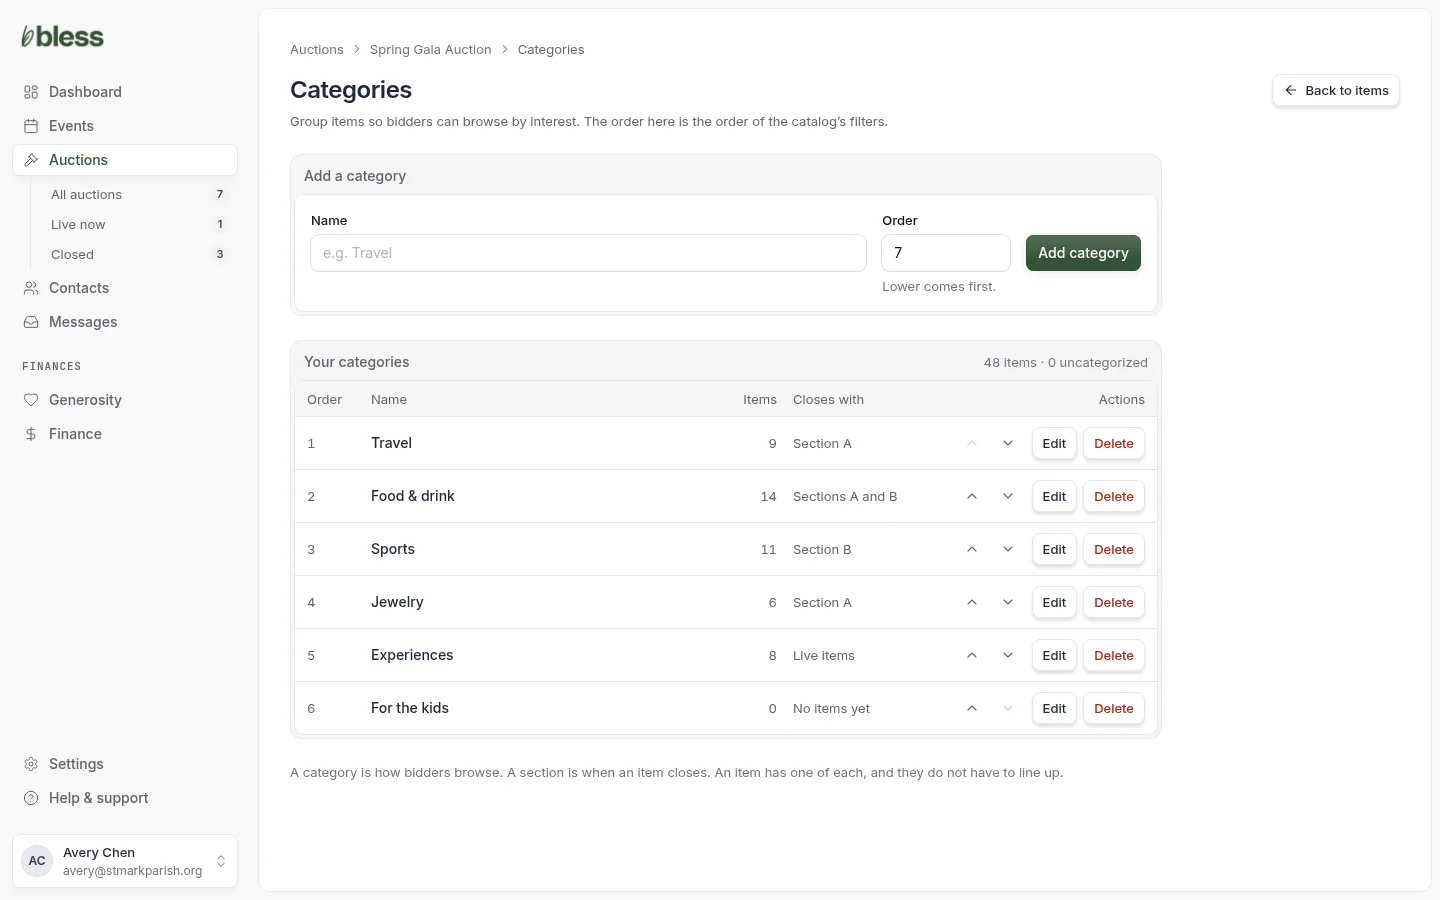
- Open Categories from the Items tab’s menu.
- Type a name and add it.
- Move a category up or down to set the filter order.
- Edit or delete one from its row.
Each row shows how many items the category holds and which section they close with. A category is how bidders browse. A section is when items close. An item has one of each.
Display sheets
A printed card for each item’s table, with a code guests scan to bid.
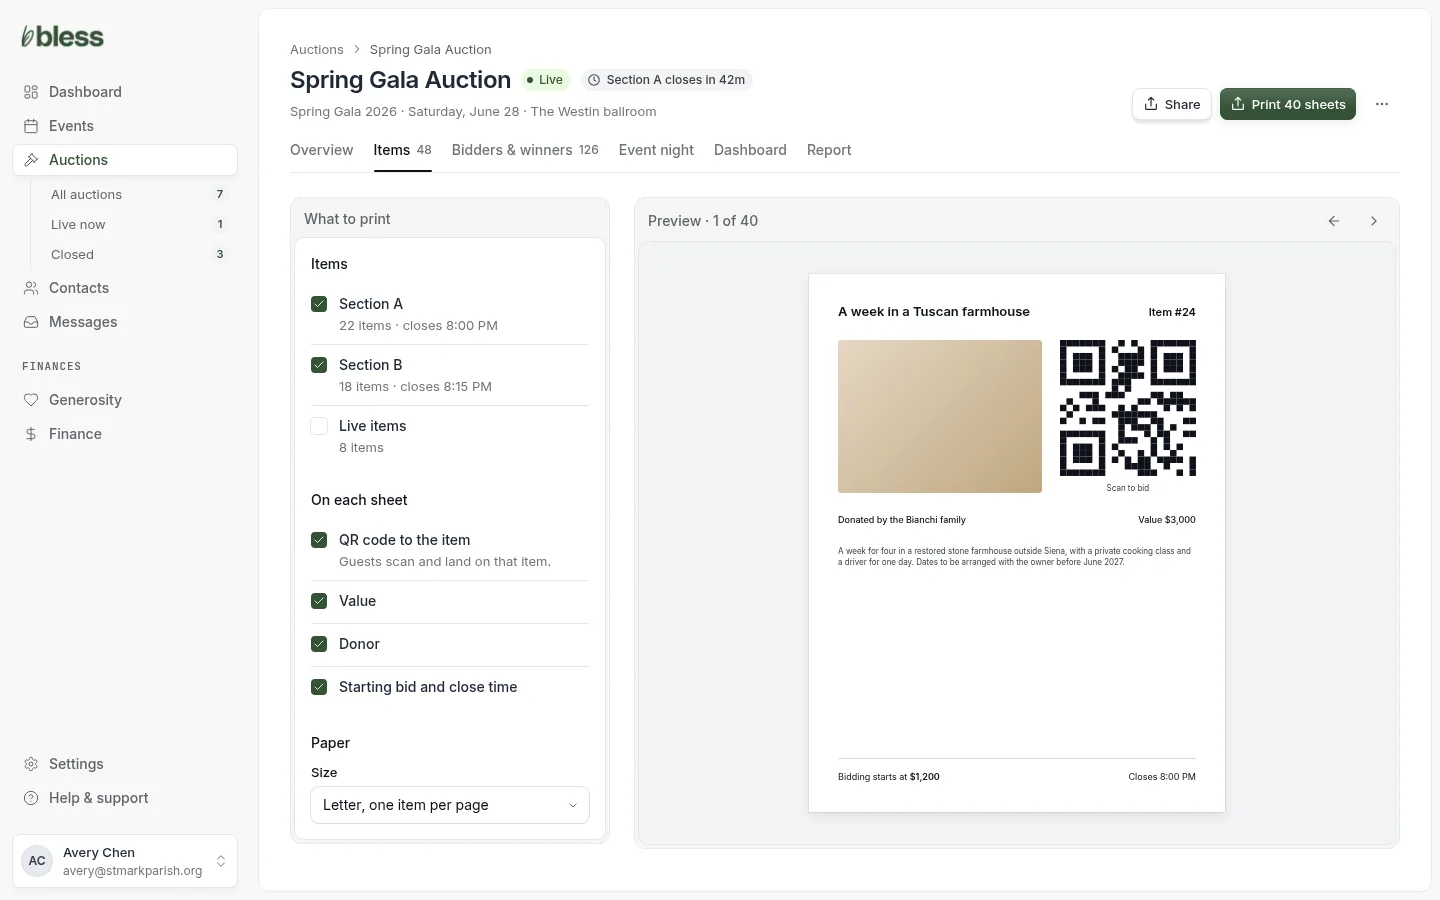
- Open Display sheets from the Items tab’s menu or from Overview.
- Choose which sections to print.
- Choose what each sheet shows.
- Check the preview and print.
The code on each sheet opens that item, so a guest standing at the table lands on its bid button. The item’s number and close time print on the sheet too.
Closing schedule
One sheet for when bidding ends and when guests pay. You set it once and rarely touch it again.
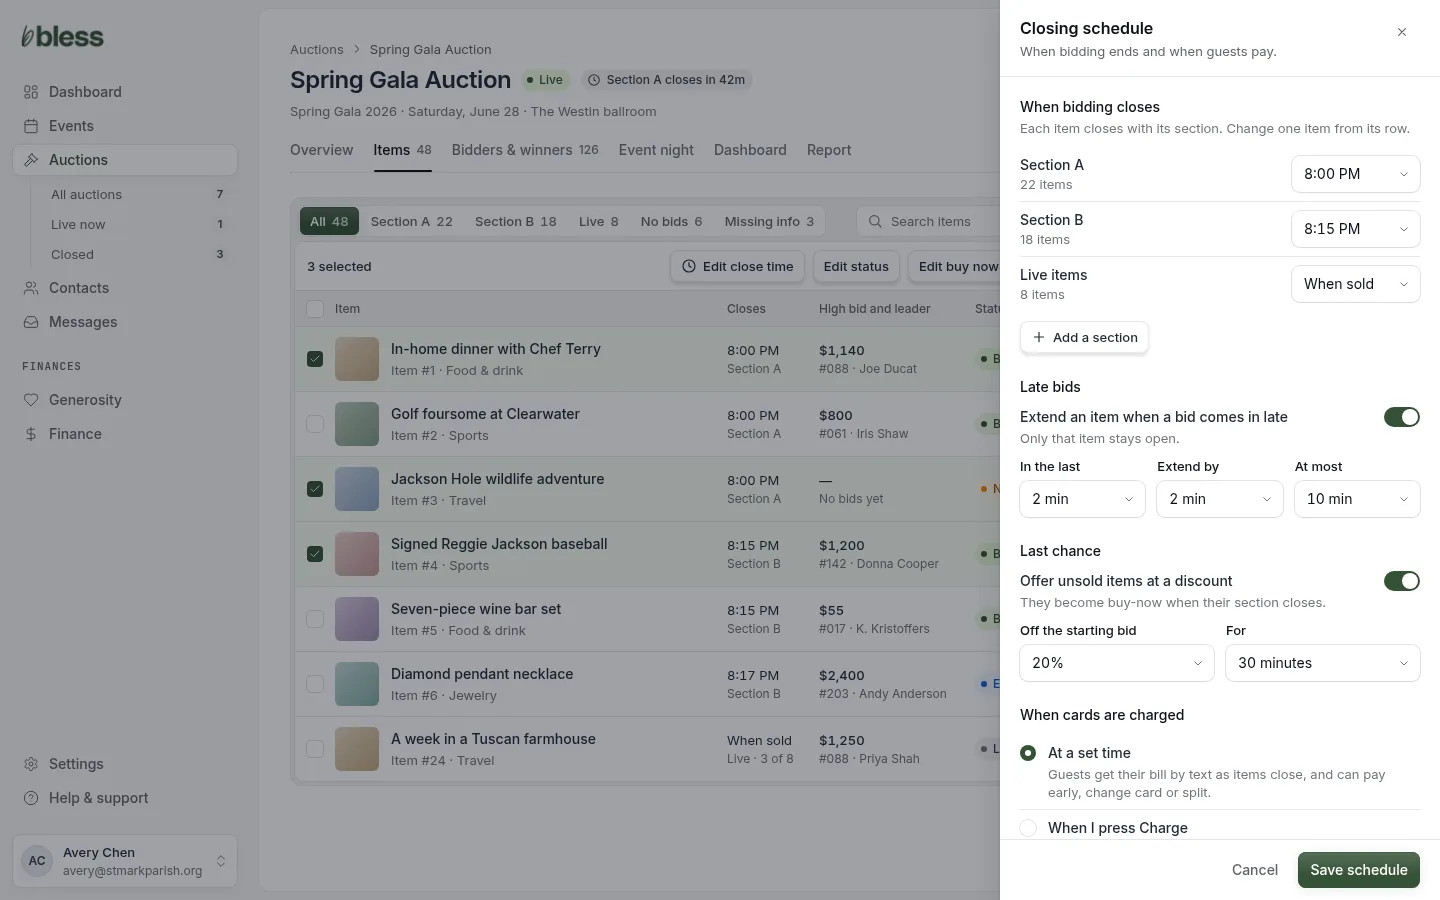
- Set a close time for each section. A section with no close time takes bids until you close it yourself.
- Choose what a late bid does. With the extension on, a bid in the last minutes keeps that one item open a little longer. Turn it off for a hard close.
- Turn Last chance on or off. Last chance offers items nobody bid on at a discount for a short time after their section closes.
- Choose when cards are charged.
Messages to guests
Guests get six emails through the night: their paddle, outbid, a five-minute warning, won, ready to collect, and paid.
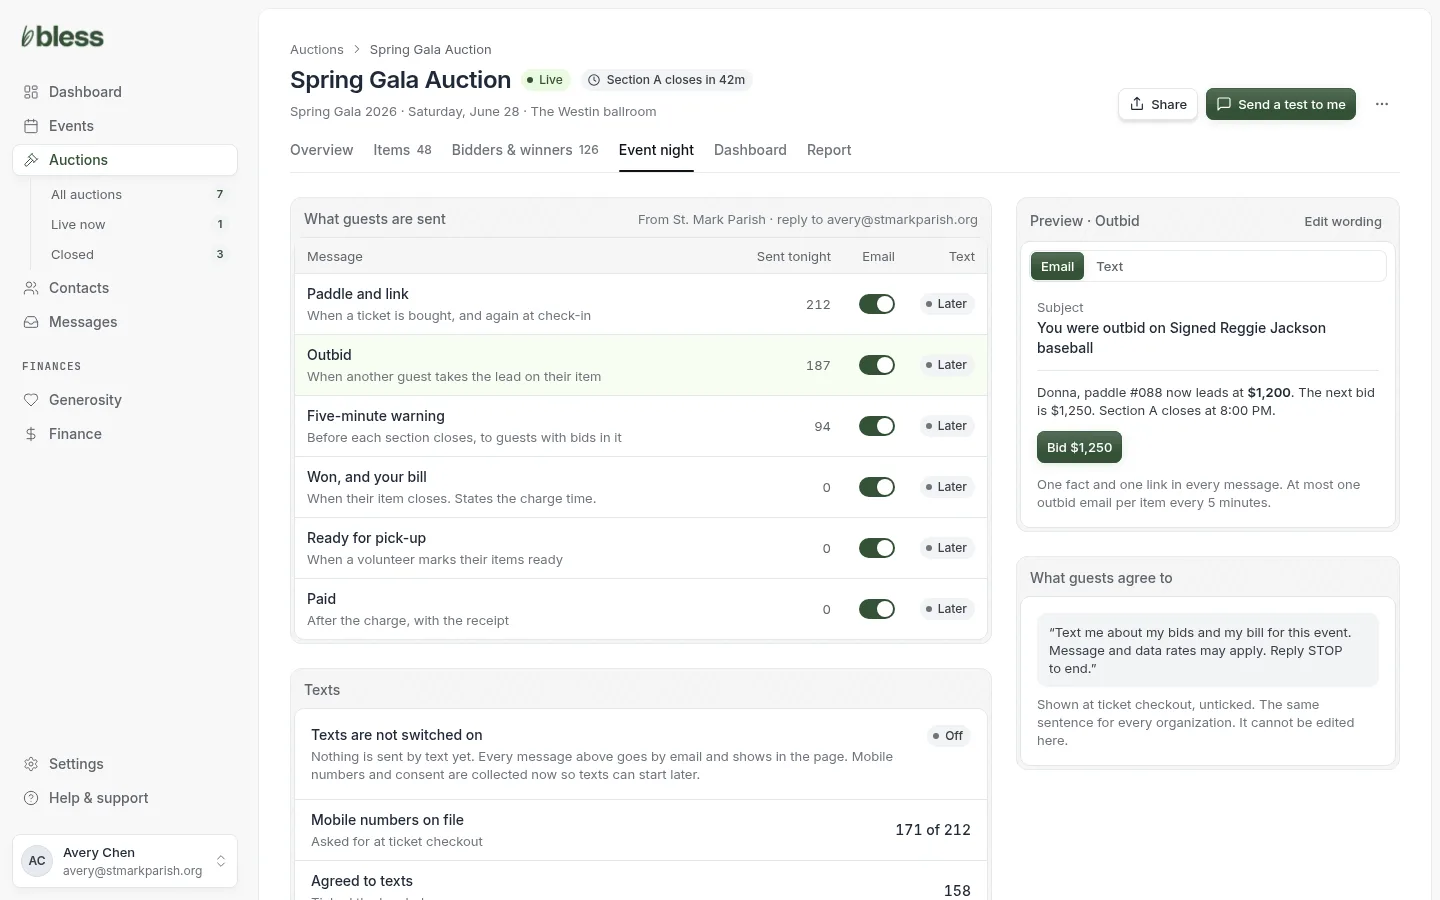
- Read down the six messages and when each one goes.
- Turn off any email you do not want sent.
- Open a message to preview it, and send a test to yourself.
- Check how many guests gave a mobile number and agreed to texts.
Messages go by email. Text messages are planned and show as off on this page.
Bidders
The Bidders tab shows everyone who can bid, with their paddle, table and card, and whether they have arrived.
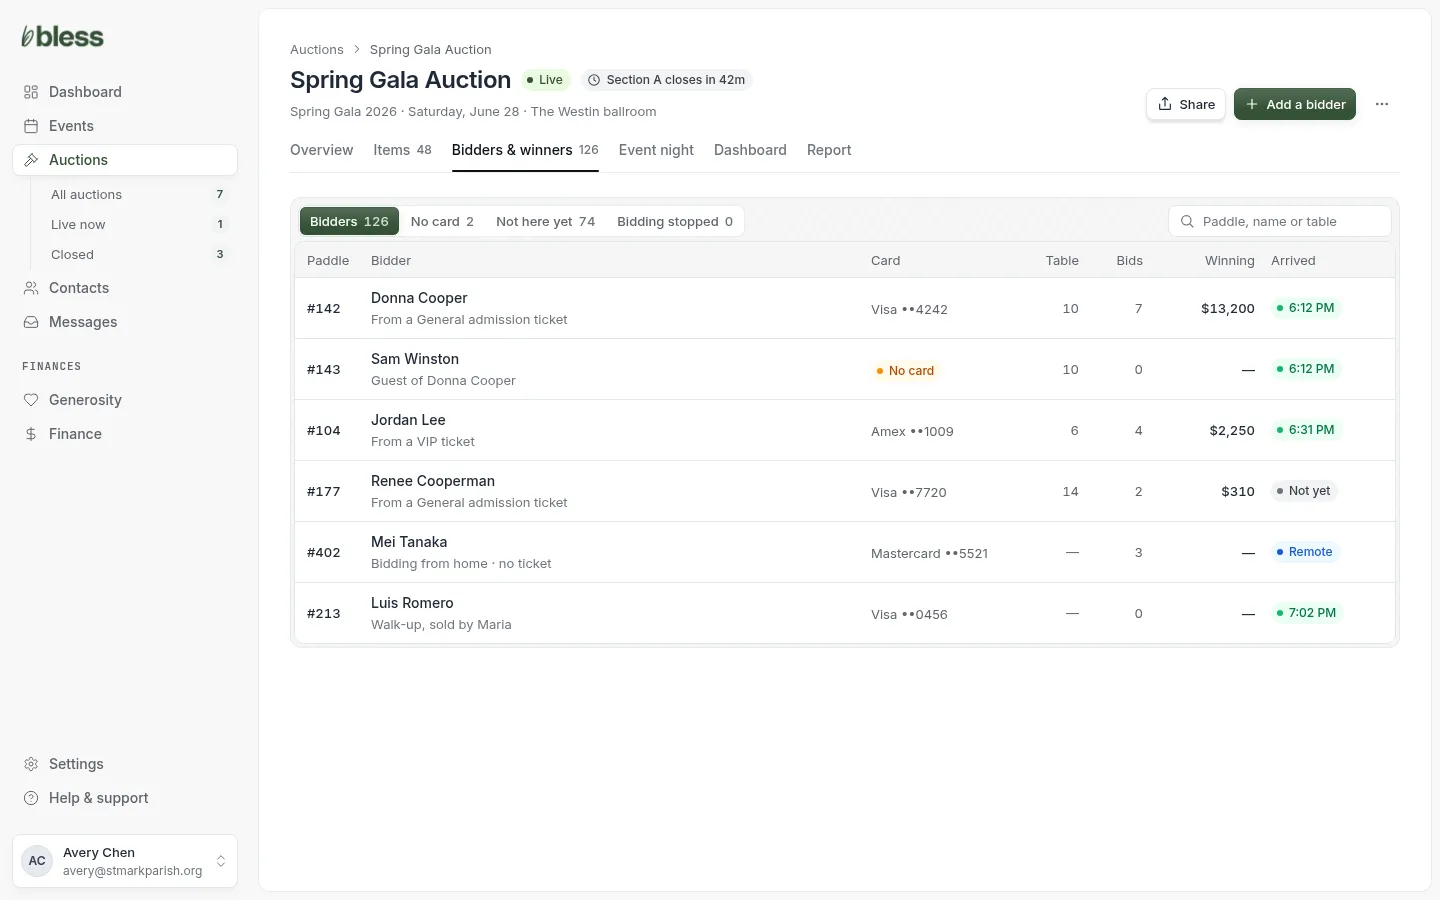
- Filter to No card or Not here yet to see who needs attention.
- Search by paddle, name or table.
- Open a row to see that guest.
Each row says where the bidder came from: a ticket, a guest of a ticket buyer, a walk-up, or someone bidding remotely.
Updated
Was this page helpful?
Thank you. Your answer helps us make these pages better.