
Giving pages
A giving page is your public donation form. Create one in five steps, share its link, and read how it is doing.
The Giving pages list
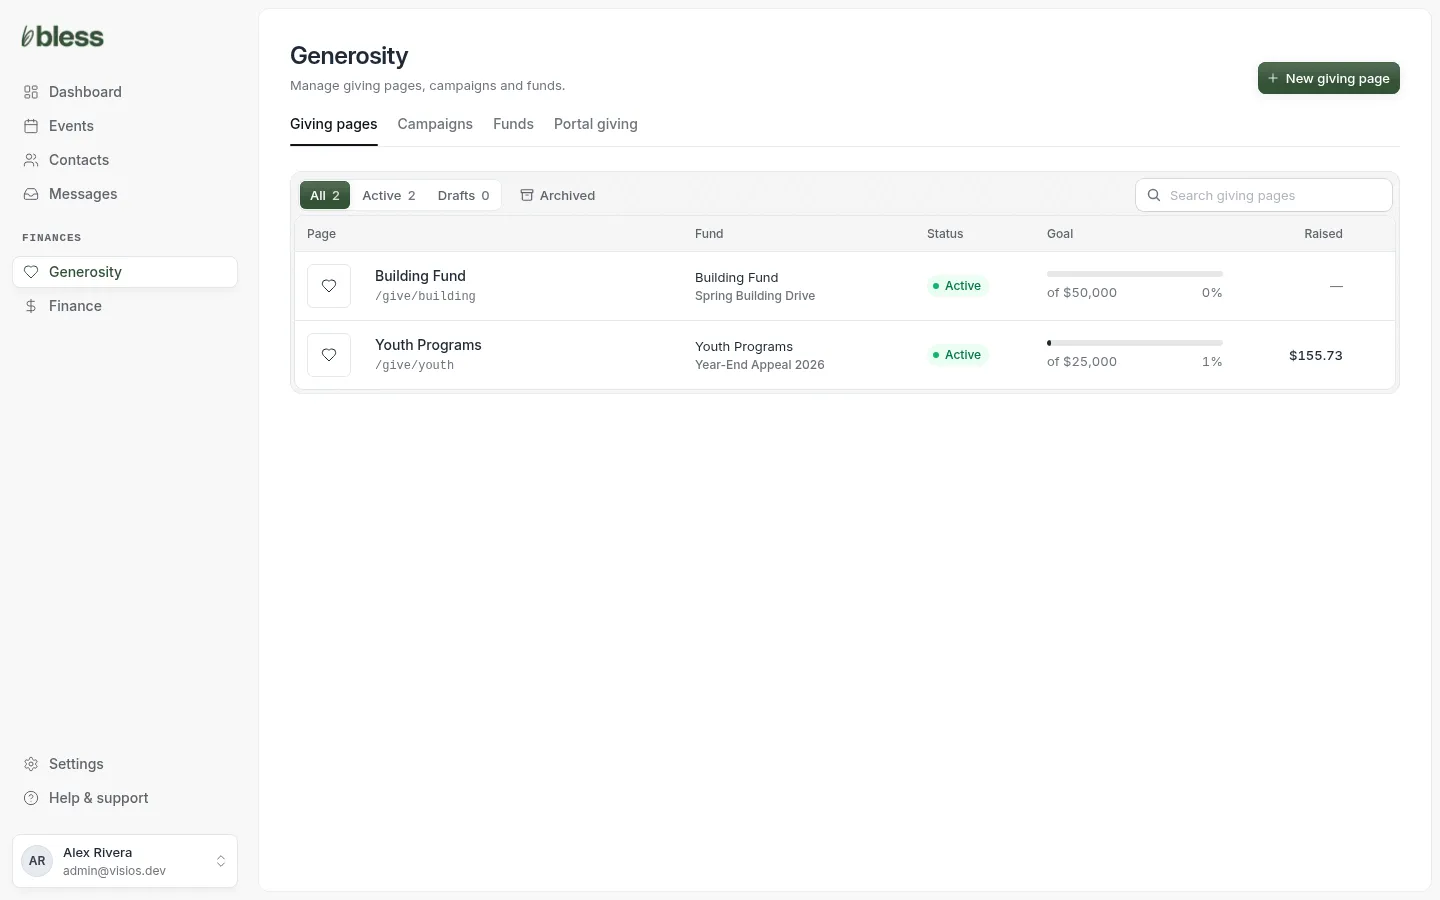
- Open Generosity. The Giving pages tab opens.
- Use All, Active and Drafts to filter, or search by name.
- Read each row: the page and its address, its fund and campaign, its status, its goal and the amount raised.
- Press a page to open it, or press New giving page.
Create a giving page
Press New giving page. A new page takes five steps. Bless saves a draft at every step.
- Save & exit keeps the draft.
- Delete draft deletes the page for good.
If Stripe is not connected yet, you see Connect Stripe first. Press Connect Stripe and finish in Settings.
Step 1: Page details
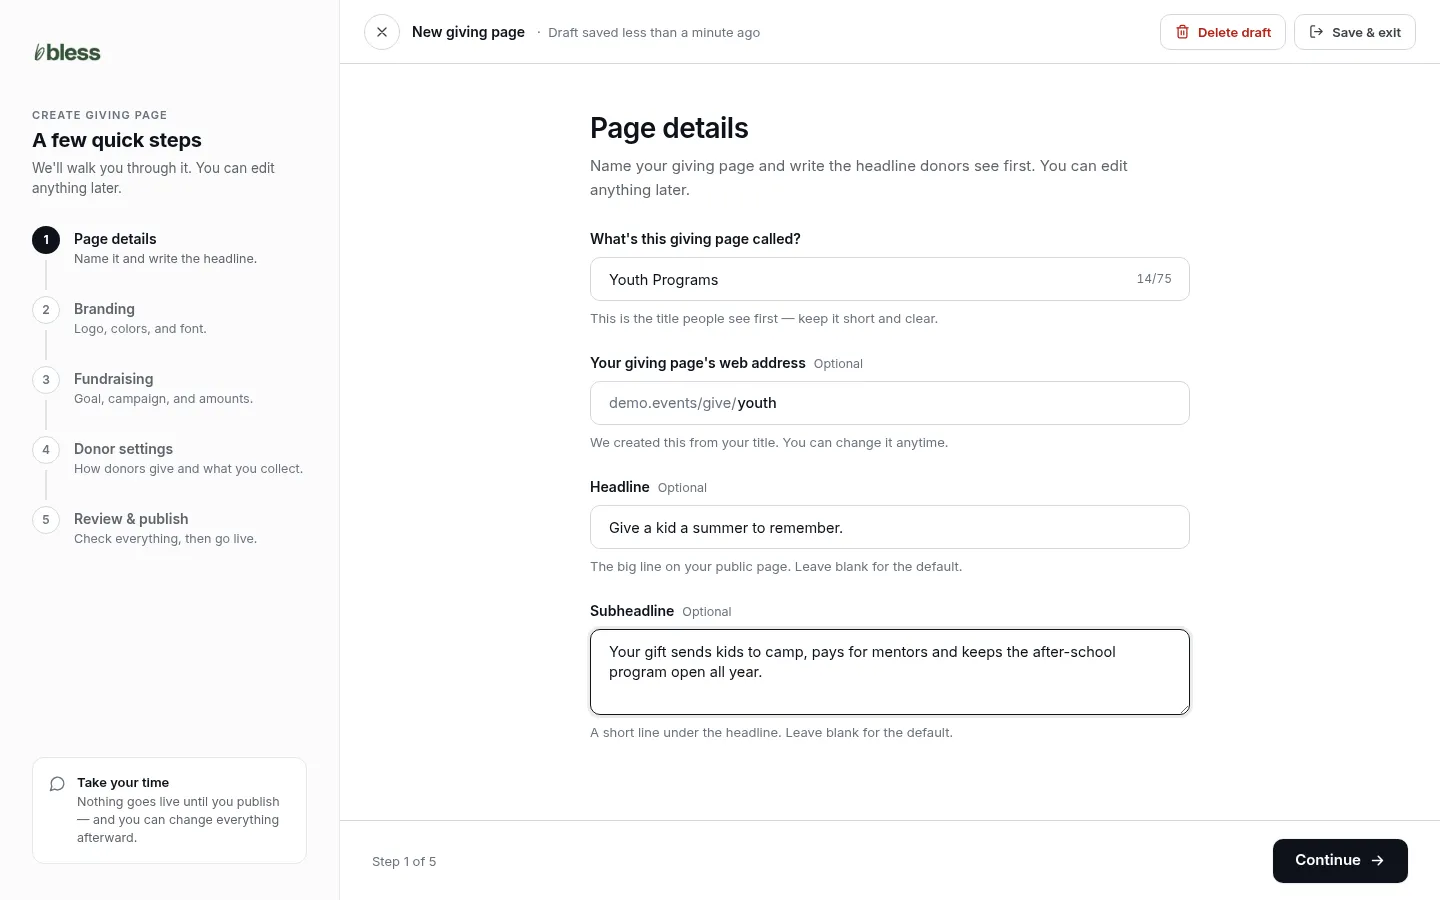
- Type the page’s name. Your team sees it. Donors do not.
- Check the web address, such as
give/youth. You can change it. - Type a Headline. It is the big line donors see first. Leave it blank to use “Give to What Matters Most.”
- Type a Subheadline: one or two sentences on what the gift does.
- Press Continue.
Step 2: Branding
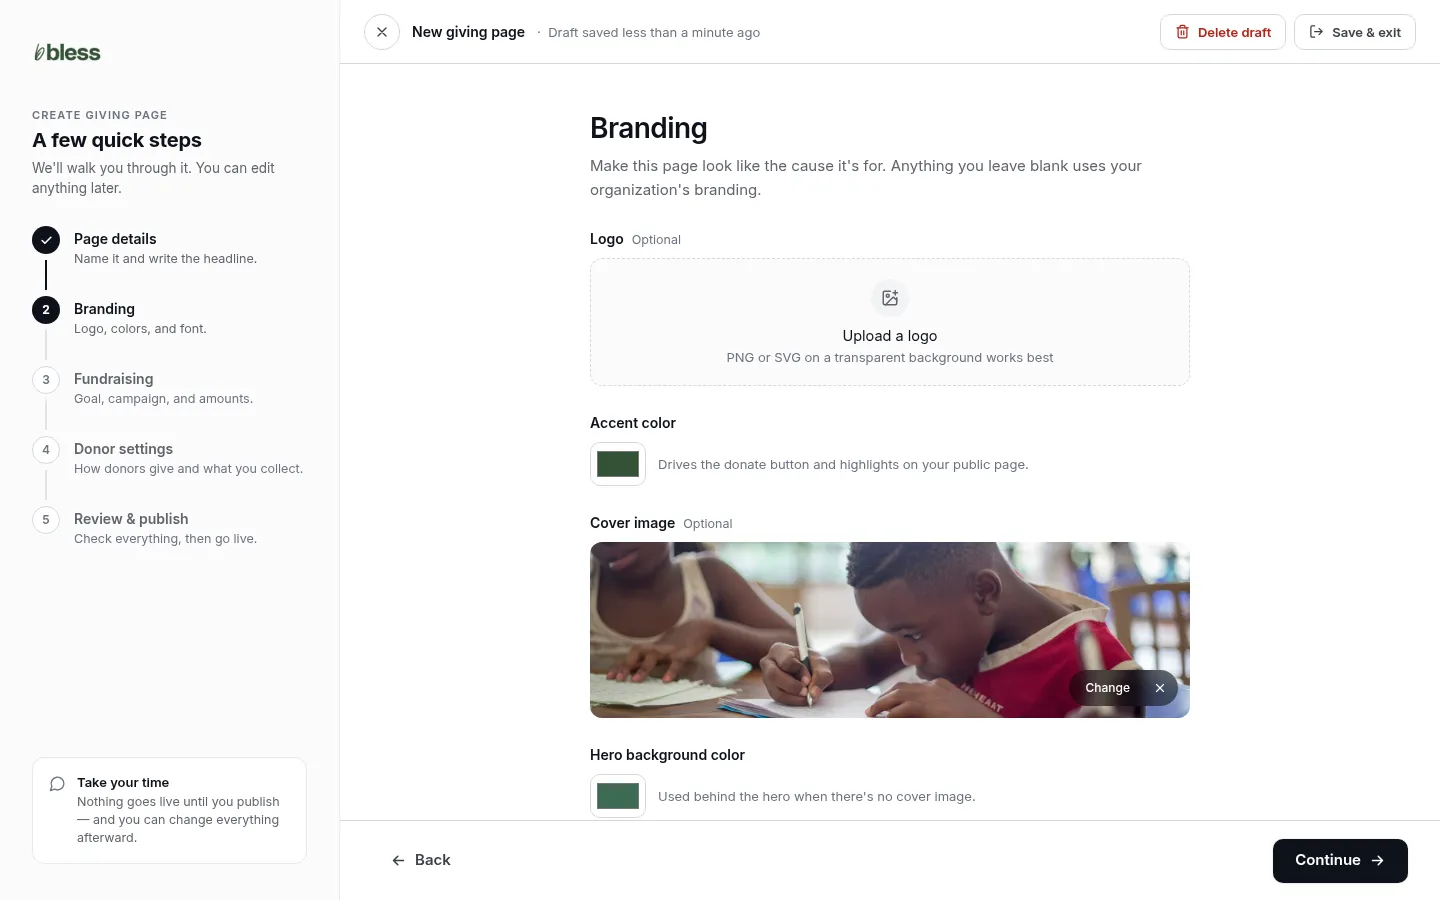
- Add a logo, or leave it blank to use your organization’s logo.
- Choose the Accent color. It colors the donate button and highlights.
- Add a Cover image. It fills the top of the page behind the headline.
- Choose a Hero background color. It shows when there is no cover image.
- Choose a font.
- Press Continue.
Images can be JPEG, PNG, GIF or WebP, up to 5 MB.
Step 3: Fundraising
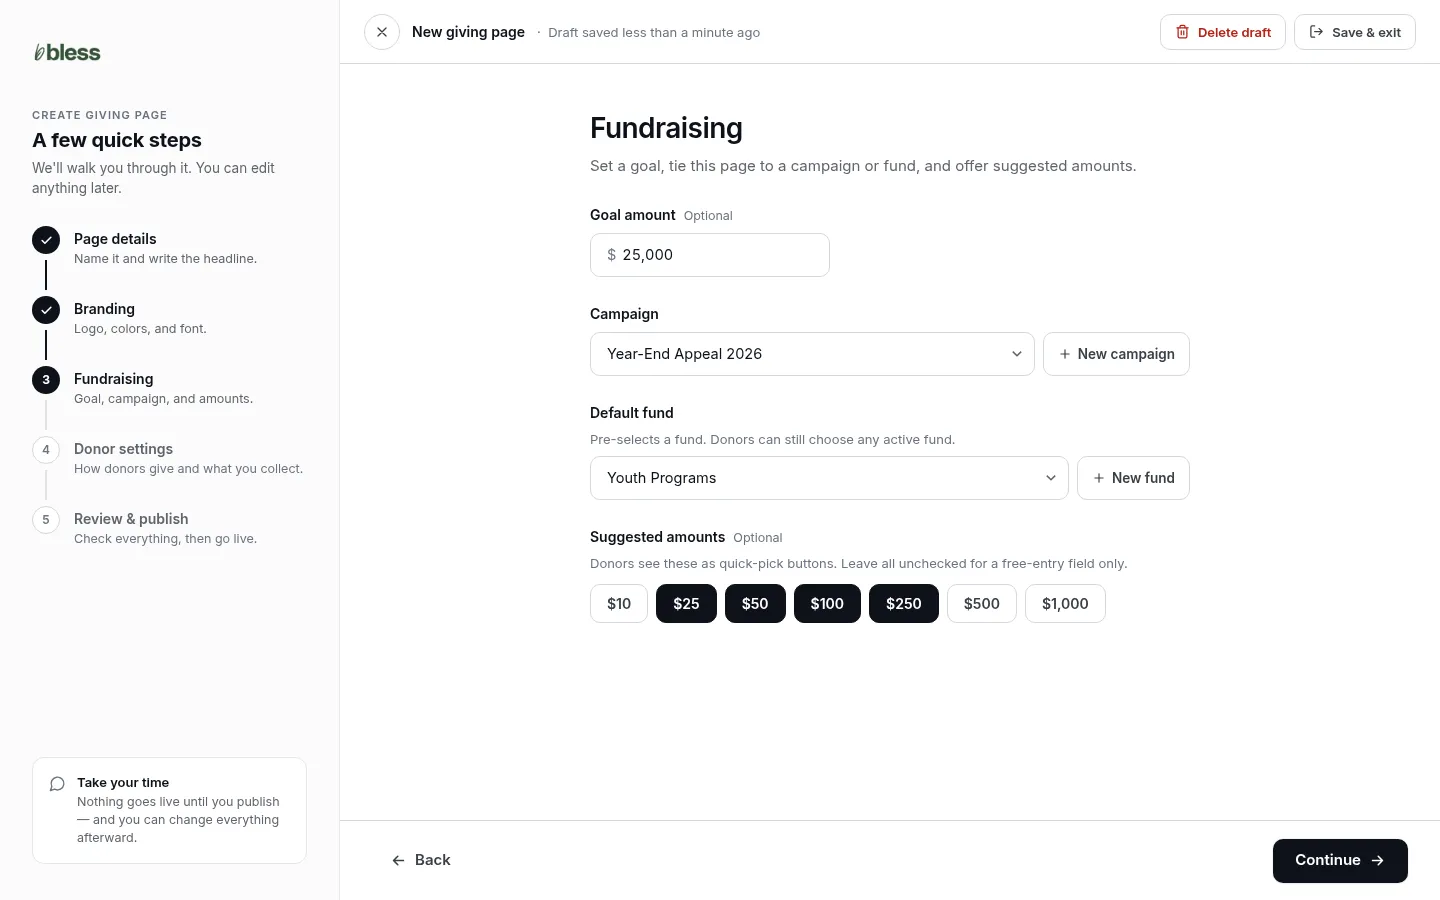
- Type a Goal amount, or leave it blank.
- Choose a Campaign. Press New campaign to make one here.
- Choose a Default fund. Donors can still choose any active fund. Press New fund to make one here.
- Tick the Suggested amounts donors can press. Leave all unticked to show only an amount box.
- Press Continue.
Step 4: Donor settings
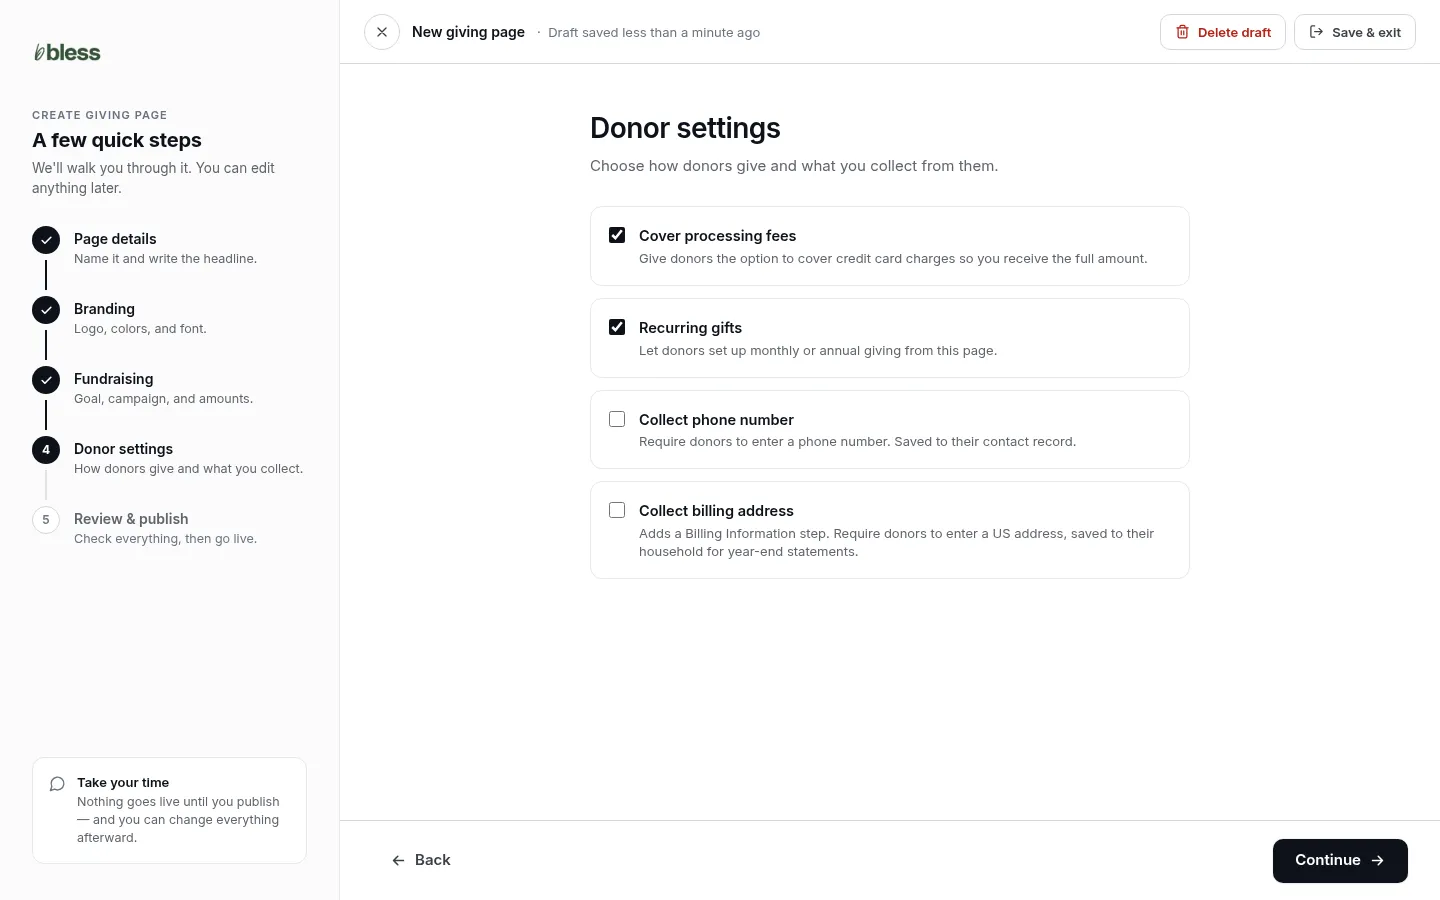
- Cover processing fees offers donors a switch to add the fee to their gift.
- Recurring gifts lets donors give weekly, every 2 weeks, monthly, or on the 1st and 15th.
- Collect phone number asks every donor for a phone number.
- Collect billing address adds a step that asks for a US address. It is saved to the donor’s household.
Press Continue.
Step 5: Review & publish
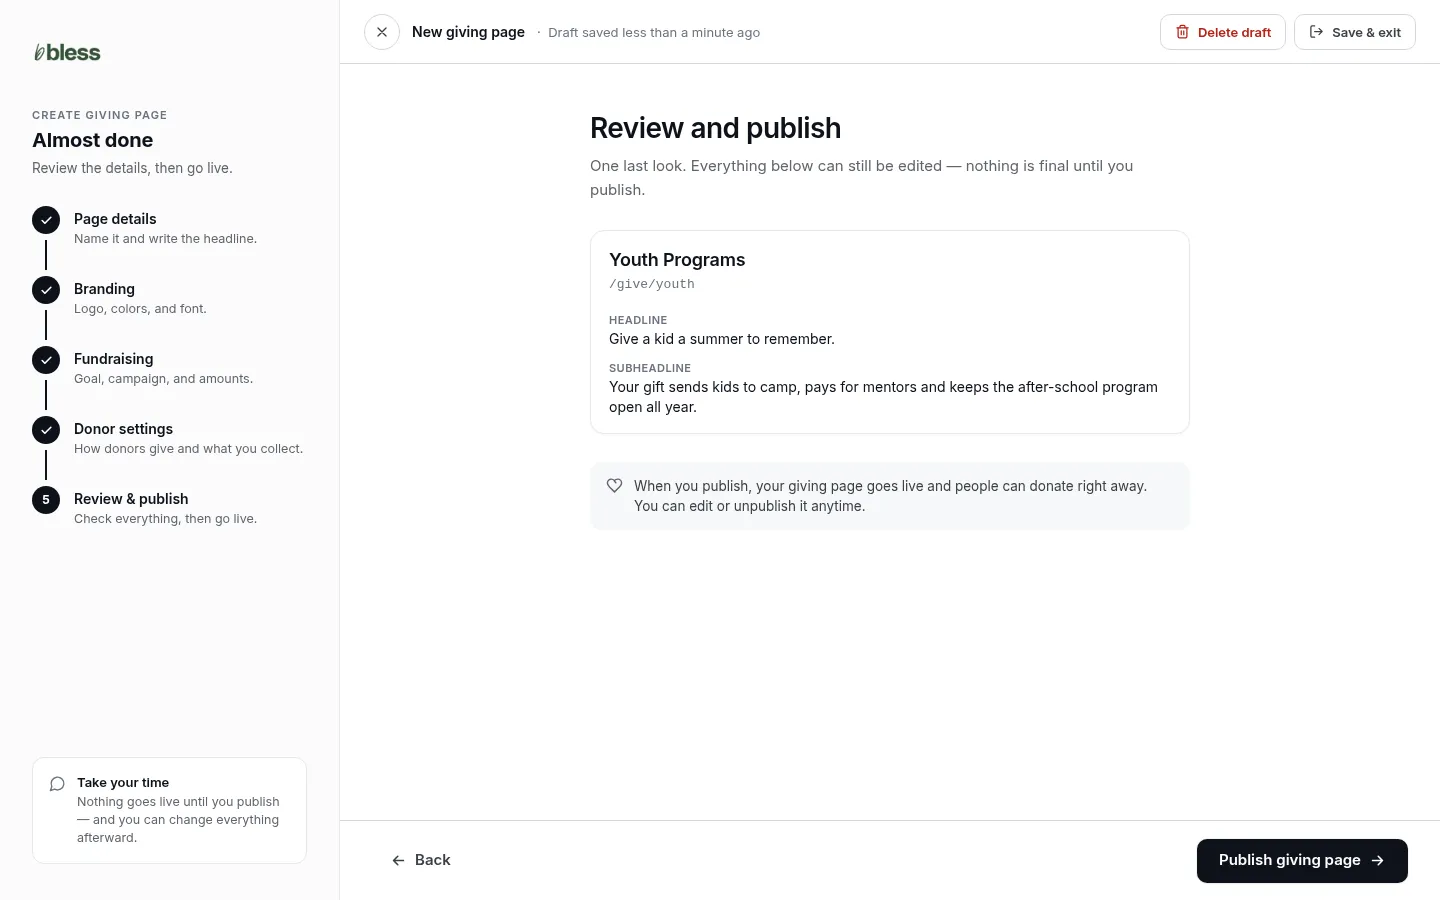
- Check the name, address, headline and subheadline.
- Press Publish giving page.
You see “Your giving page is live.” Donors can give at once.
The giving page
Press a page in the list to open it.
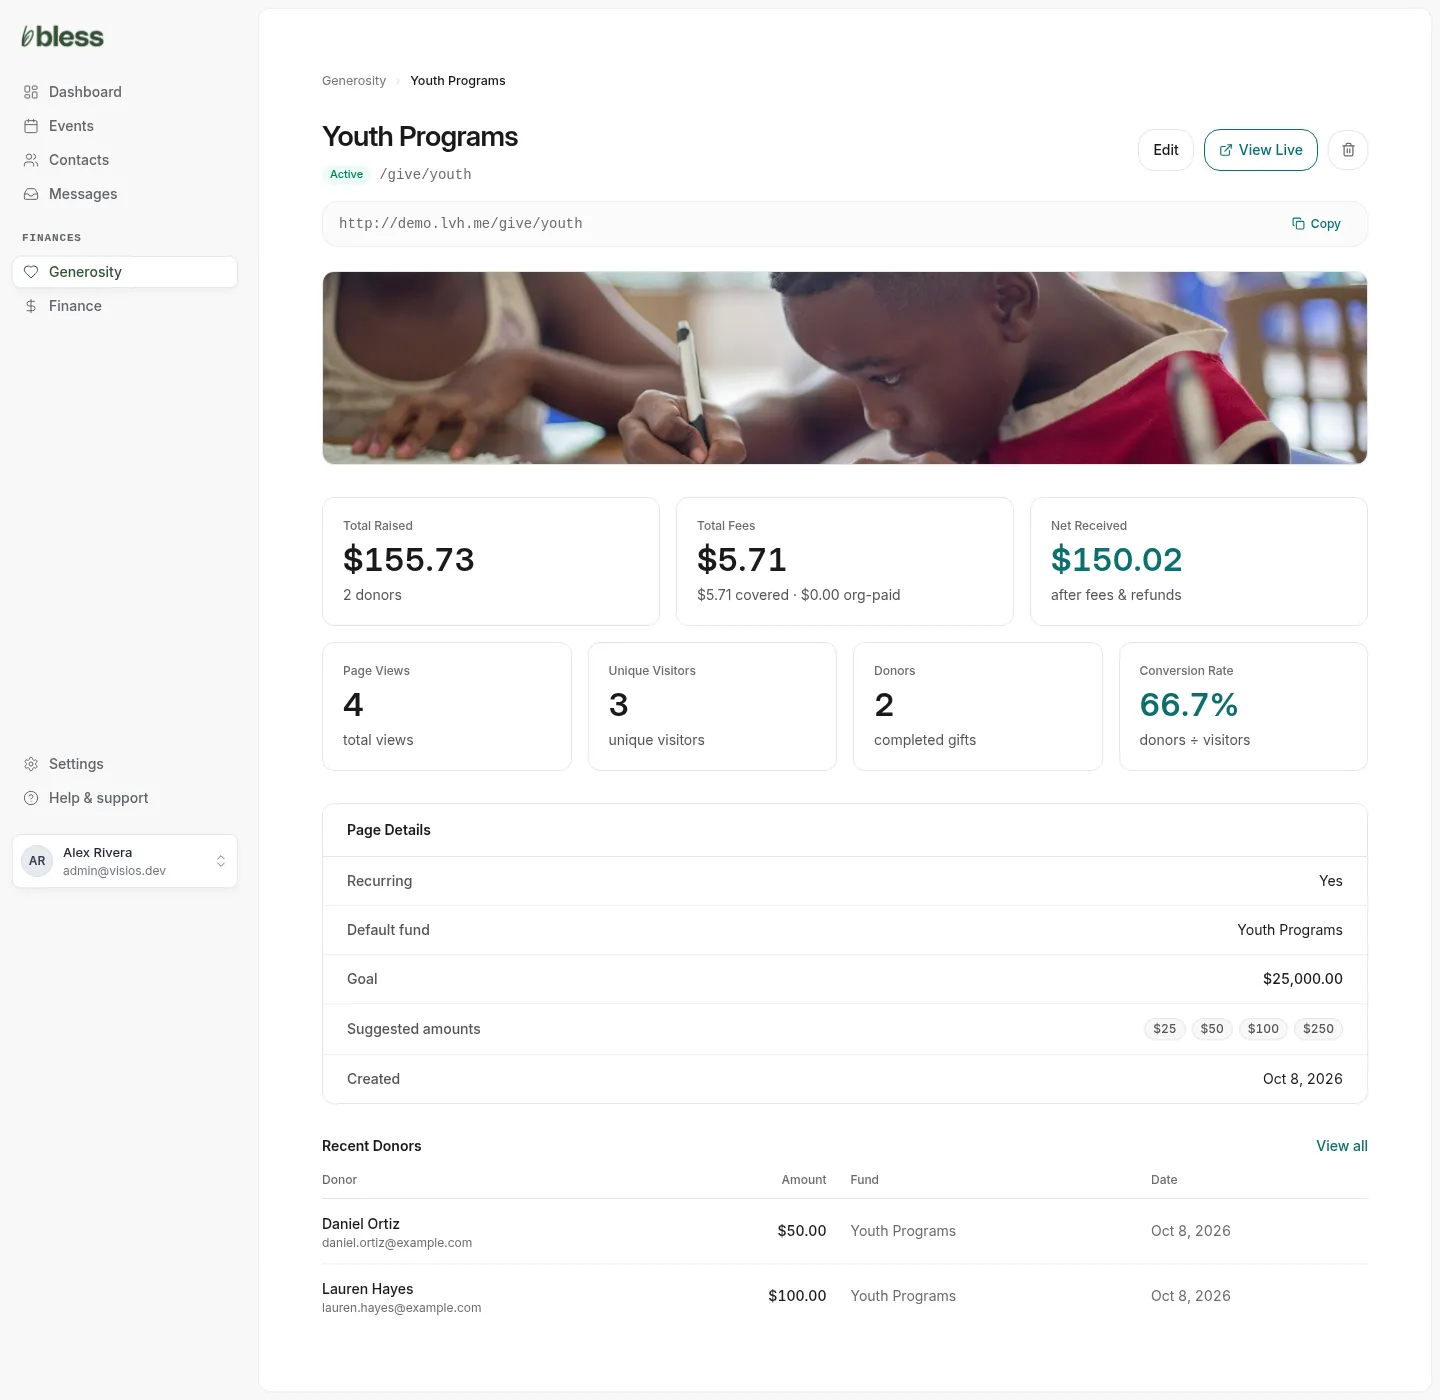
- The address box shows the public link. Press Copy to copy it.
- Total Raised, Total Fees and Net Received show the money.
- Page Views, Unique Visitors, Donors and Conversion Rate show how many visitors gave.
- Page Details shows the settings. Recent Donors shows the last ten gifts.
Share the page
- Open the page.
- Press Copy next to the address, or View Live to open it.
- Paste the link into an email, your website or a post.
Members can also give from their account without the link. See Portal giving.
Edit, archive or delete
- Edit opens the same five steps. On the last step, press Save changes.
- The trash button on a draft deletes it for good.
- The trash button on a live page moves it to Archived. Its gifts stay. The page stops taking gifts. Press Restore in the Archived list to bring it back.
Updated
Was this page helpful?
Thank you. Your answer helps us make these pages better.