Set up Salesforce
Prepare your Salesforce org, create a connected app for Bless, then connect it from Settings. Plan about 30 minutes with your Salesforce admin.
Before you start
You need:
- A production Salesforce org. Bless signs in at
login.salesforce.com, so a sandbox (test.salesforce.com) cannot connect yet. - The Visios managed package, installed in the org. Bless writes to its objects and fields. See What the package provides.
- A Salesforce admin, to create the connected app and the integration user.
- An owner or admin in Bless.
- Your Bless web address, such as
riverside.blessevents.com.
What the package provides
The Visios package adds these objects. Bless writes to all of them.
| Object | API name |
|---|---|
| Campus | Visios__Campus__c |
| Gathering (an event) | Visios__Gatherings__c |
| Gathering Session | Visios__Gathering_Session__c |
| Tickets and Options | Visios__Tickets_and_Options__c |
| Registration | Visios__Registrations__c |
| Registration Item | Visios__Registration_Item__c |
| Check-In | Visios__Check_Ins__c |
| Batch | Visios__Batch__c |
It also adds fields to standard objects:
- Contact:
Visios__Bless_ID__c,Visios__External_ID__c,Visios__Gender__c,Visios__Relationship__c. - Opportunity:
Visios__Fee__c,Visios__Frequency__c,Visios__Fund__c,Visios__Payment_Type__c,Visios__Source__c,Visios__Transaction_ID__c.
If one of these fields is missing, Salesforce refuses the whole record. Keep the package up to date.
If you use NPSP
Bless finds the Nonprofit Success Pack on its own.
| With NPSP | Without NPSP | |
|---|---|---|
| Household accounts | NPSP makes them. Bless uses the account NPSP gives each contact. | Bless creates an Account named “(last name) Household”. |
| Gift donor | Written to npsp__Primary_Contact__c |
Written to Primary_Contact__c, if your org has that lookup field |
Create the connected app
Your Salesforce admin does this in Salesforce.
- Open Setup. In Quick Find, type “App Manager”.
- Press New Connected App. Do not use External Client Apps.
- Type the Connected App Name, such as “Bless Events”, and a Contact Email.
- Tick Enable OAuth Settings.
- In Callback URL, type your Bless address followed by
/salesforce/callback. For example:https://riverside.blessevents.com/salesforce/callback. - Under Selected OAuth Scopes, add Full access (full) and Perform requests at any time (refresh_token, offline_access).
- Tick Require Proof Key for Code Exchange (PKCE).
- Leave Require Secret for Web Server Flow ticked.
- Press Save.
- Press Manage Consumer Details and type the code Salesforce emails you.
- Copy the Consumer Key (it starts with
3MVG9) and the Consumer Secret.
Wait 10 minutes after you save. Salesforce can take that long to turn on a new app.
The callback URL must match exactly: https, your own Bless address, and no slash at the end.
Create an integration user
Bless writes every record as the Salesforce user who connects it. Use a user for Bless only, not a person’s own login. If a person leaves and their user is turned off, syncing stops.
The integration user needs:
- API Enabled.
- Create, read and edit on Contact, Account, Opportunity and Campaign.
- Create, read and edit on every Visios object in the table above.
- Read on the organization’s settings, so Bless can read your time zone.
Connect in Bless
- Sign in to Bless as an owner or admin, at your organization’s own address.
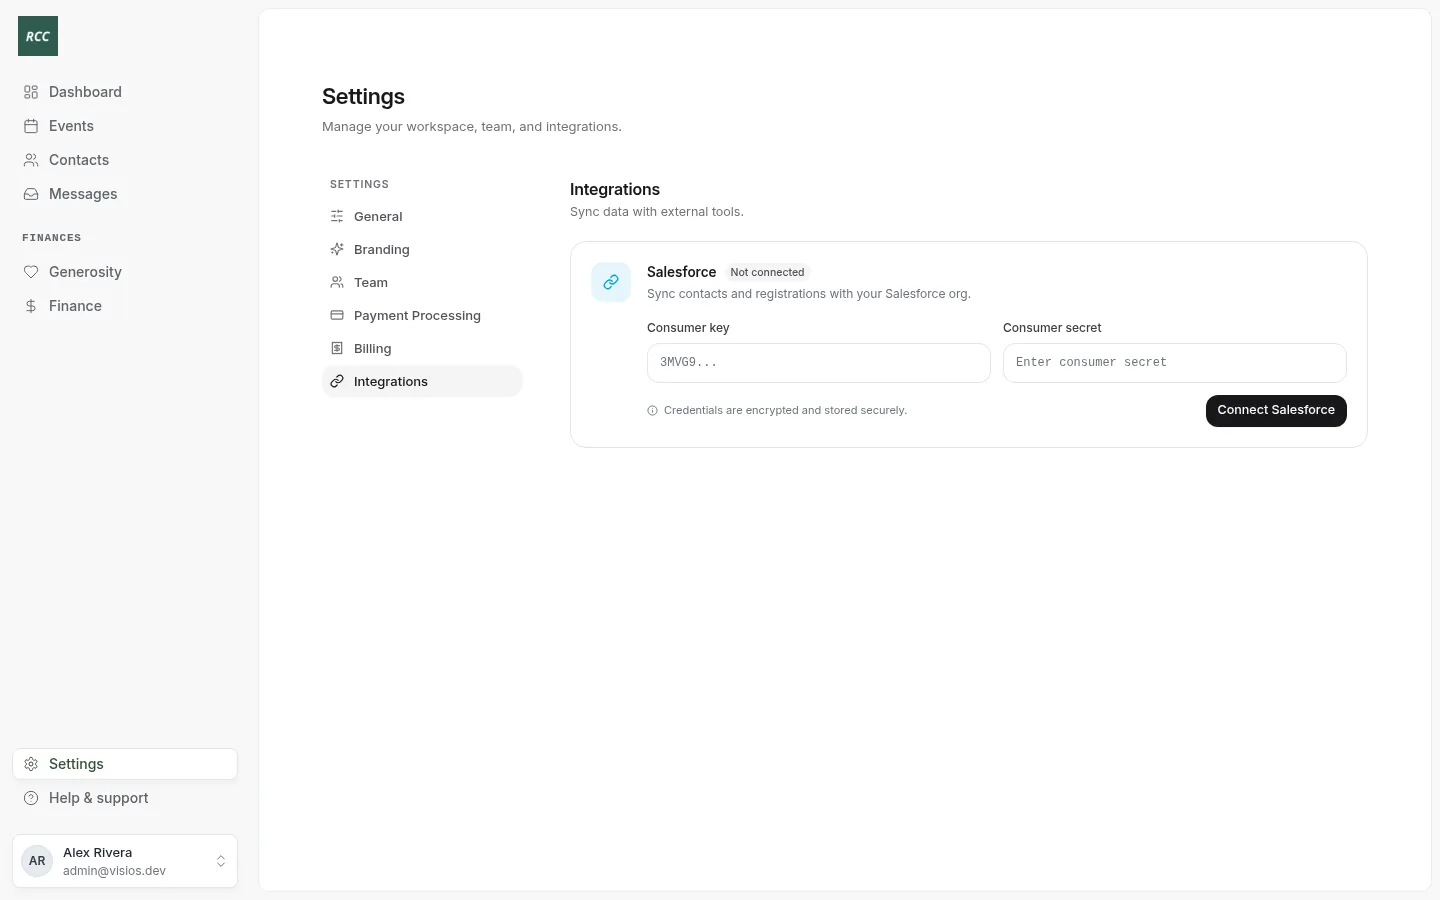
- Open Settings and press Integrations.
- Type the Consumer key and the Consumer secret.
- Press Connect Salesforce. Salesforce opens.
- Sign in as the integration user.
- Press Allow.
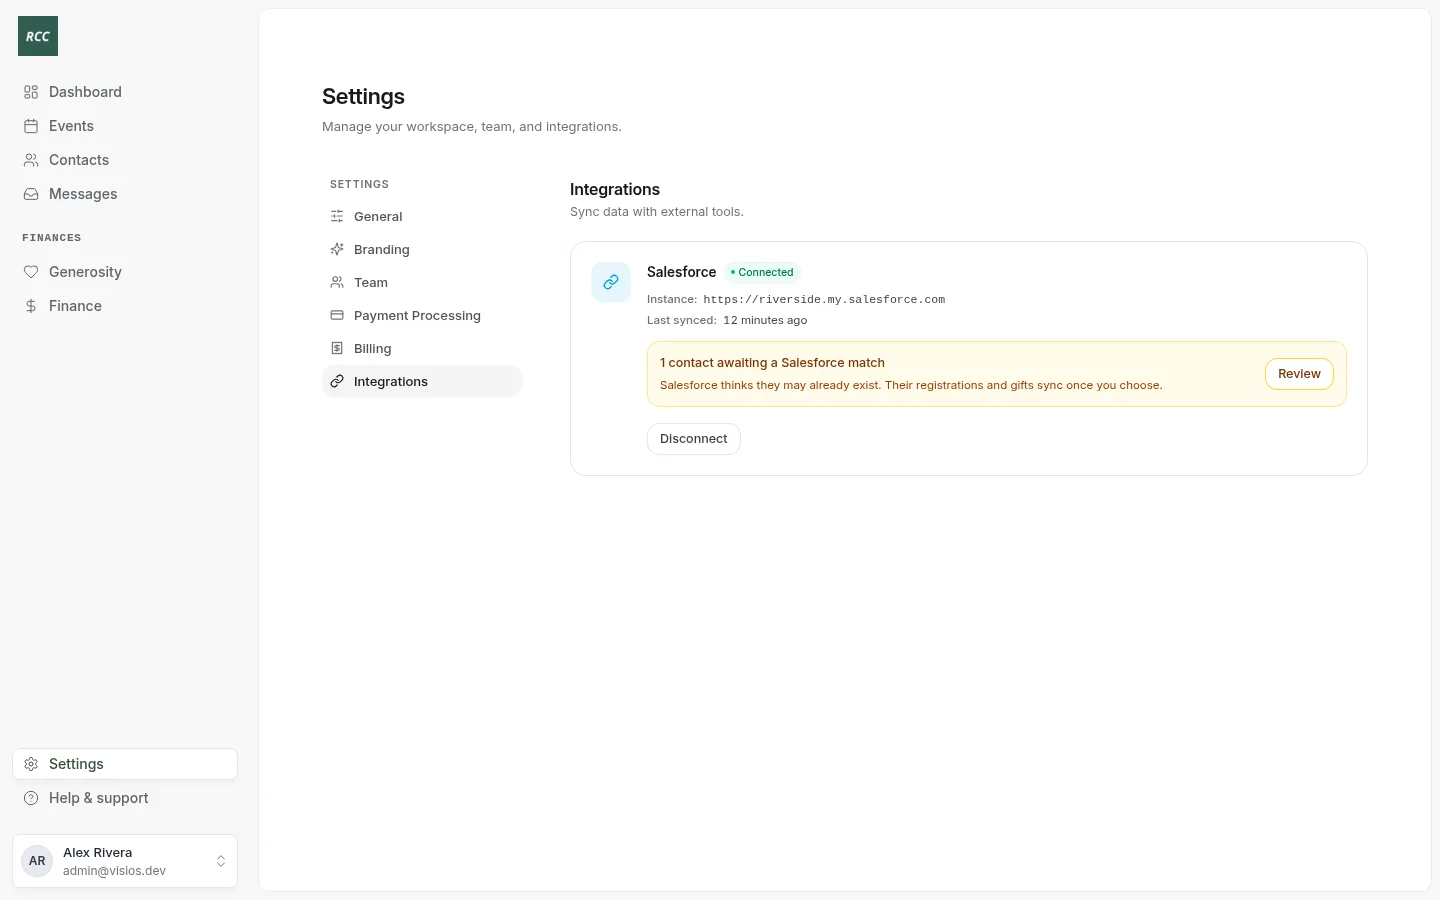
Salesforce sends you back to Bless. You see “Salesforce connected successfully.” The card shows Connected, your Salesforce instance and Last synced.
What happens when you connect
- Bless creates a campus. It adds one Campus record, named for your primary location, or your organization’s name. Every event Bless sends is linked to it.
- Bless reads your time zone. If you have no events yet, Bless uses your Salesforce org’s time zone. If you have events, Bless keeps its time zone. Ask the Bless team to change it.
- Your records start to flow. Bless does not send everything at once. See Your existing records.
Your existing records
Bless sends records that already exist in Bless, from the start, with no date limit. It does this in its 6-hourly check, up to 500 records of each kind at a time. A large organization can take a day or more to catch up. New changes sync in seconds while this happens.
If you want everything sent at once, ask the Bless team to run the first sync for you.
If connecting fails
| You see | What to do |
|---|---|
| “Cross-org OAuth flows are not supported” | The app was made as an External Client App. Make a New Connected App in App Manager. |
redirect_uri_mismatch |
The callback URL does not match. Check https, your address and the slash at the end. |
| “Salesforce connection failed” | Read the reason after it. Wait 10 minutes after you save a new app, then try again. |
| “Invalid OAuth state. Please try again.” | Start again from Settings › Integrations. |
| “Please enter your Salesforce credentials first.” | Type the consumer key and secret before you press Connect Salesforce. |
| An error page after you press Allow | Check that the app has the refresh_token, offline_access scope. |
Updated
Was this page helpful?
Thank you. Your answer helps us make these pages better.